Special fees available on our 200, 300 and 500 hour Yoga Teacher Training courses.
BEGINNER FOUNDATIONS
Top 10 Yoga Poses for Beginners Complete Guide for 2026
Mastering a few foundational shapes is all you need to step on the mat. Check out the top 10 yoga poses for beginners, complete with alignment tips, common mistakes to avoid, and prop modifications designed for modern tight bodies.
SBy Shivam Chauhan••Calculating...
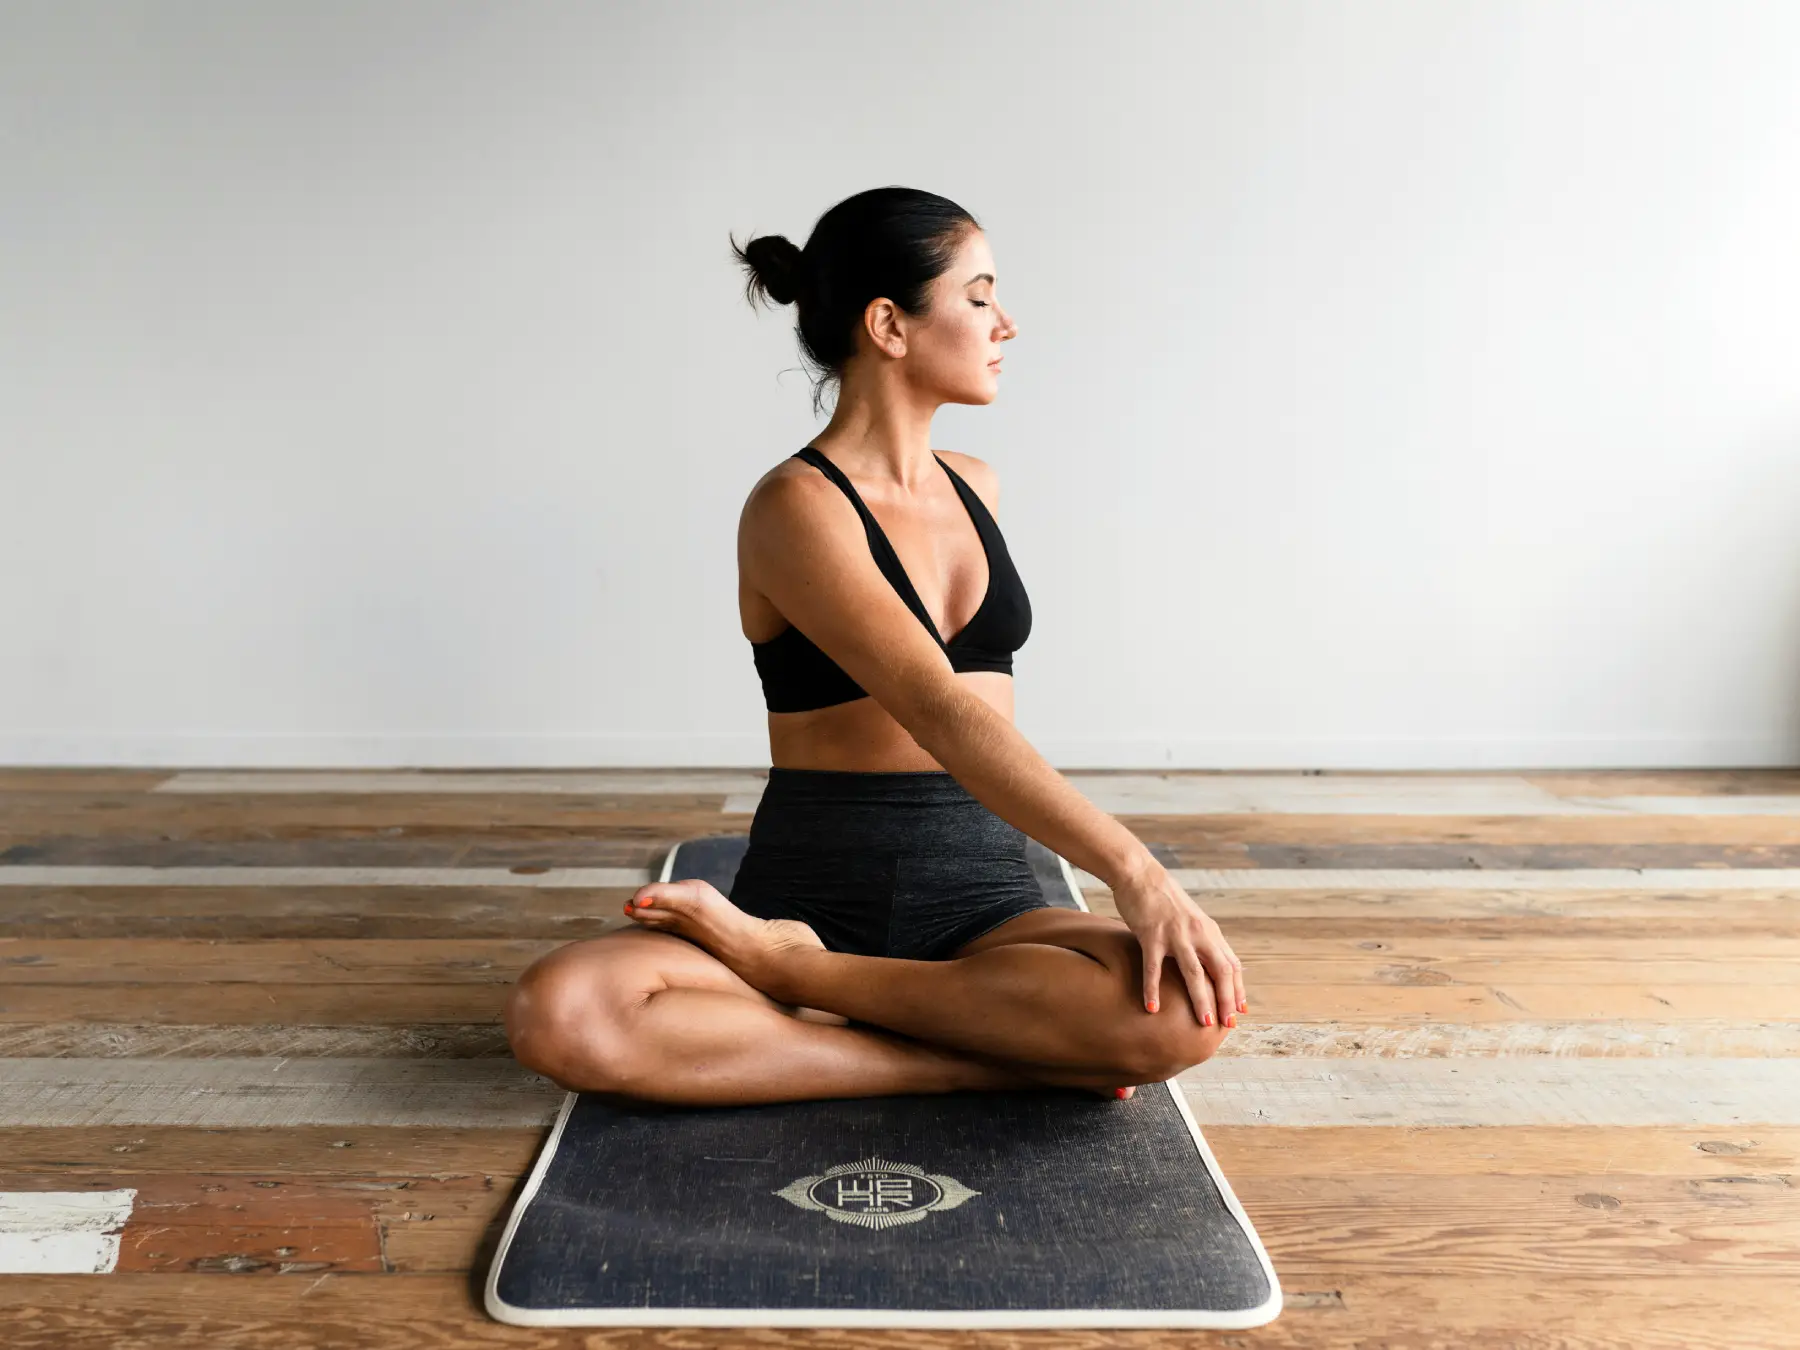
Seated Spinal Twist - A seated yoga posture that gently rotates the spine while maintaining an upright position and relaxed breathing.
If you are stepping onto a yoga mat for the first time, the endless array of Sanskrit names, intricate shapes, and flexible practitioners on social media can easily feel intimidating. The modern lifestyle defined by hours at a desk, tight hip flexors, rounded upper backs, and general joint stiffness often makes the body feel resistant to traditional stretching. However, a sustainable yoga practice was never about performing picture perfect, acrobatic postures.
Instead, foundational yoga is rooted in functional movement, joint mobility, and nervous system regulation. Mastering a core group of foundational postures allows you to build strength safely, release chronic tension, and establish the breath awareness necessary for a lifelong practice. Whether you plan to explore Hatha, Vinyasa, or dynamic systems like the Ashtanga Primary Series, starting with these ten essential poses provides the ideal architectural blueprint for your yoga journey.
FOUNDATIONAL PERSPECTIVE
Introduction and Shifting from Aesthetic Shapes to Functional Movement
When digital feeds are flooded with hyper flexible practitioners performing complex physical feats, it can be a bit difficult to step on the mat for the first time. For the modern beginner navigating 2026, daily life is frequently defined by prolonged hours spent sitting at a desk, resulting in shortened hip flexors, rounded upper backs, and general joint stiffness that makes the body feel resistant to traditional stretching.
Rather than chasing picture perfect, acrobatic shapes, a sustainable practice shifts the focus entirely toward functional movement. By prioritizing joint mobility, functional strength, and nervous system regulation over external aesthetics, each posture becomes a tool for physical resilience that directly counters the postural strains of desk work.
Mastering a core group of ten foundational postures creates a reliable, stress-free gateway into any style of yoga, whether you choose gentle Hatha, dynamic Vinyasa, or structured lineages like Ashtanga. Rather than overwhelming your mind with hundreds of Sanskrit names, establishing this solid baseline provides the ideal architectural framework to support your practice for years to come.
CORE ASANAS INTRO & ENHANCED POSE BREAKDOWN
The 10 Essential Poses for Beginners
Building a resilient yoga practice does not require learning hundreds of complex shapes. By mastering these ten foundational postures, you establish a strong structural baseline that balances strength, flexibility, joint stability, and nervous system regulation. Think of these poses as your core movement toolkit each shape targets common physical imbalances caused by modern sedentary habits, such as tight hip flexors, rounded upper backs, and weak postural muscles.
Below, each posture is broken down with its Sanskrit origin, anatomical focus, step-by-step entry cues, common alignment mistakes, and intelligent prop hacks to help you adapt every pose to your unique body.
Pose 1: Mountain Pose (Tadasana)
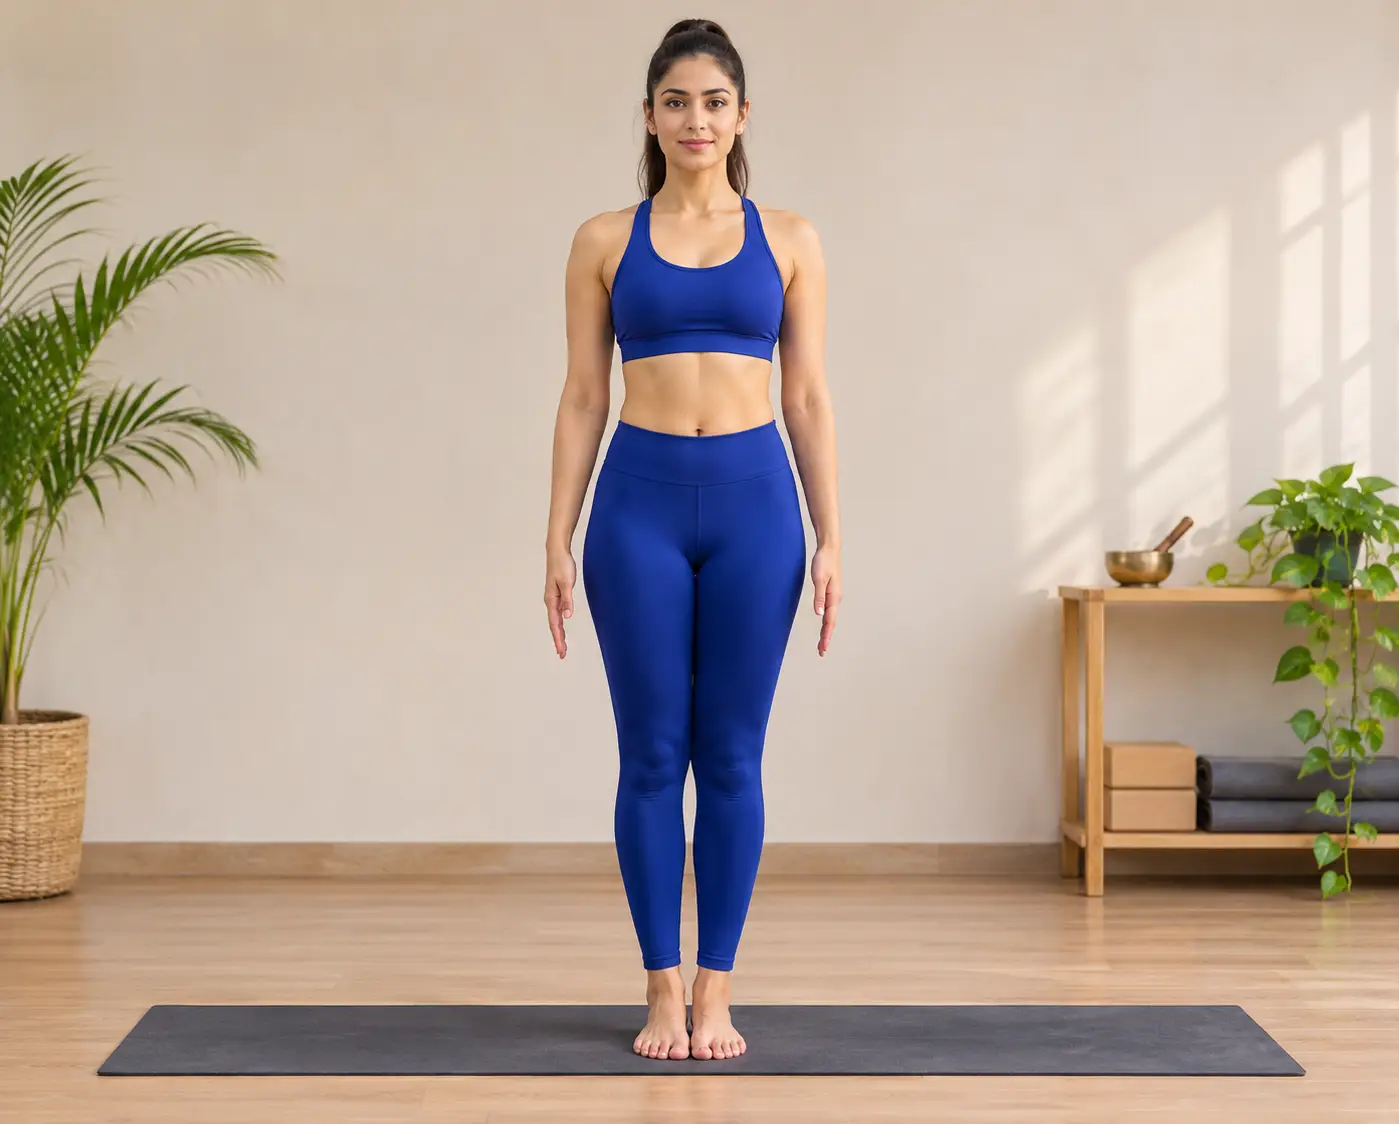
The name Tadasana comes from the Sanskrit words Tada (meaning "mountain") and Asana (meaning "seat" or "posture"). Often overlooked as simply standing up, Mountain Pose represents stillness, strength, and unwavering balance. It serves as the physical and conceptual blueprint for all standing postures in yoga, teaching you how to distribute body weight evenly and align your joints from the ground up.
Sanskrit and Anatomy Focus
Sanskrit Name: Tadasana (tah-DAHS-ah-nah)
Target Muscles and Joint Actions: Quadriceps, gluteal complex, deep core stabilizers, and spinal erectors. Promotes neutral spinal extension and balanced weight distribution across all four points of the feet.
Step by Step Entry
Stand with your feet hip-width apart or with your big toes touching and heels slightly separated.
Root down through all four corners of your feet, engage your thighs, and lift your kneecaps.
Draw your lower abdomen gently inward while lengthening your tailbone down toward the floor.
Roll your shoulders up, back, and down, opening your chest while allowing your arms to rest naturally by your sides with palms facing forward.
Lengthen through the crown of your head and maintain a slow, steady diaphragmatic breath.
Common Mistakes to Avoid
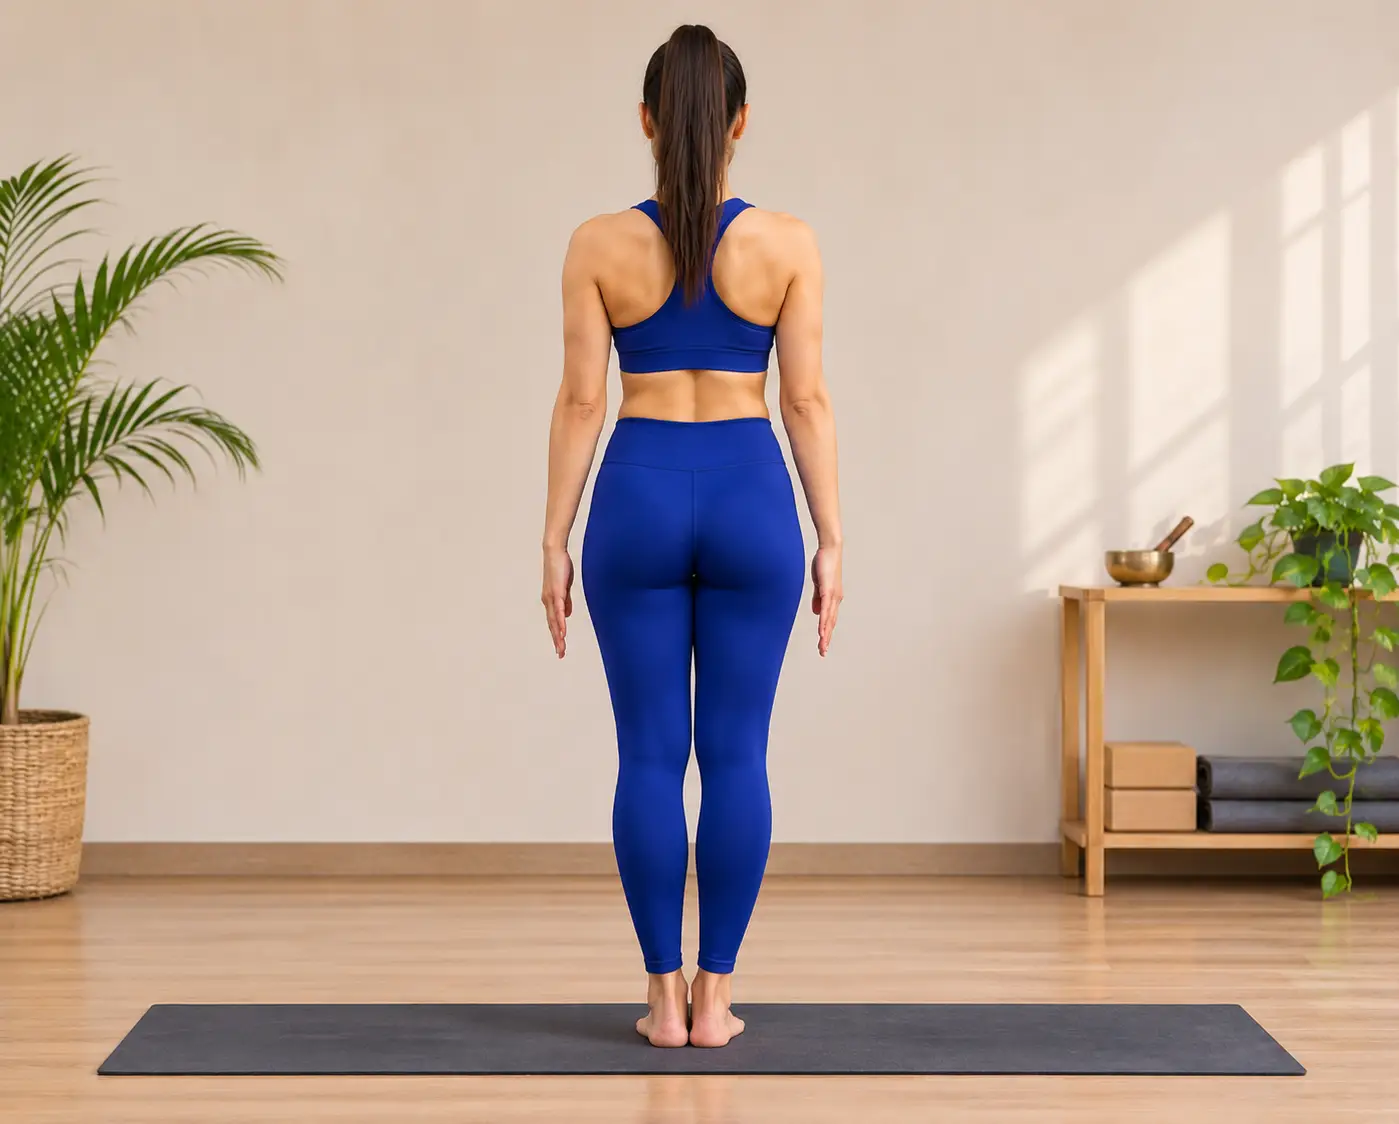
Over-arching the lower back by flaring the ribcage outward.
Locking the knees backward, which cuts off blood flow and strains the joint capsule.
Shifting all weight into the heels or toes rather than keeping it centered.
Prop Modifications
Inner Thigh Block Hack: Place a foam block between your inner thighs. Gently squeeze the block inward and roll it slightly backward to automatically fire the adductors and deep pelvic floor muscles.
Mountain Pose (Tadasana) - Front ViewMountain Pose (Tadasana) - Back View
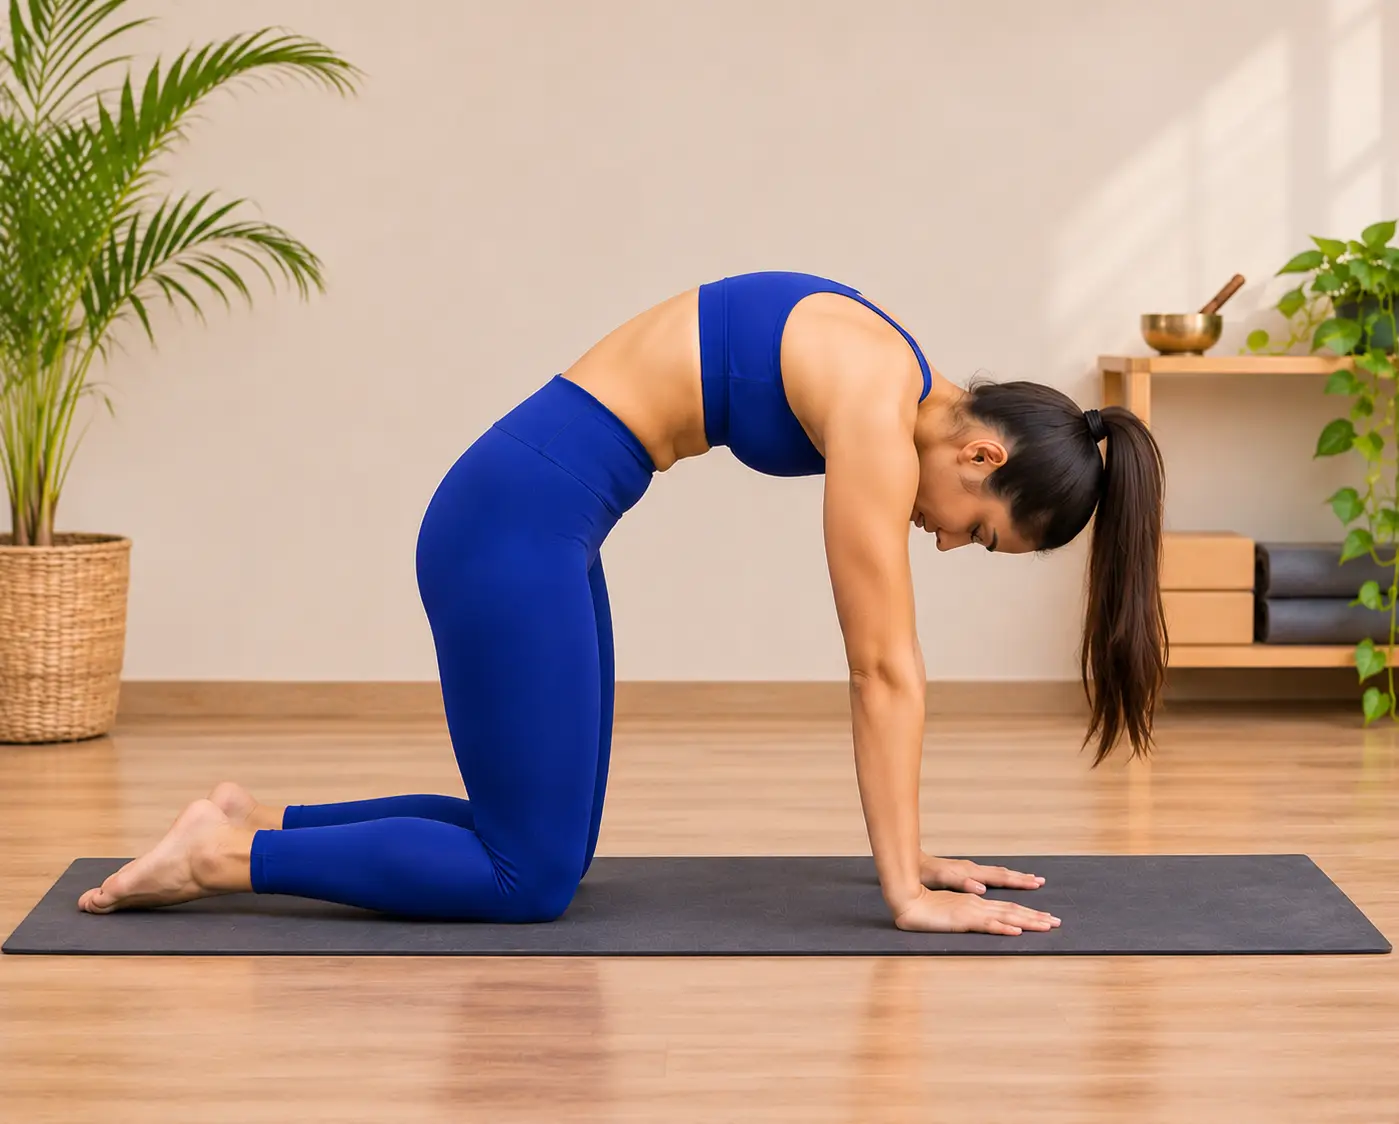
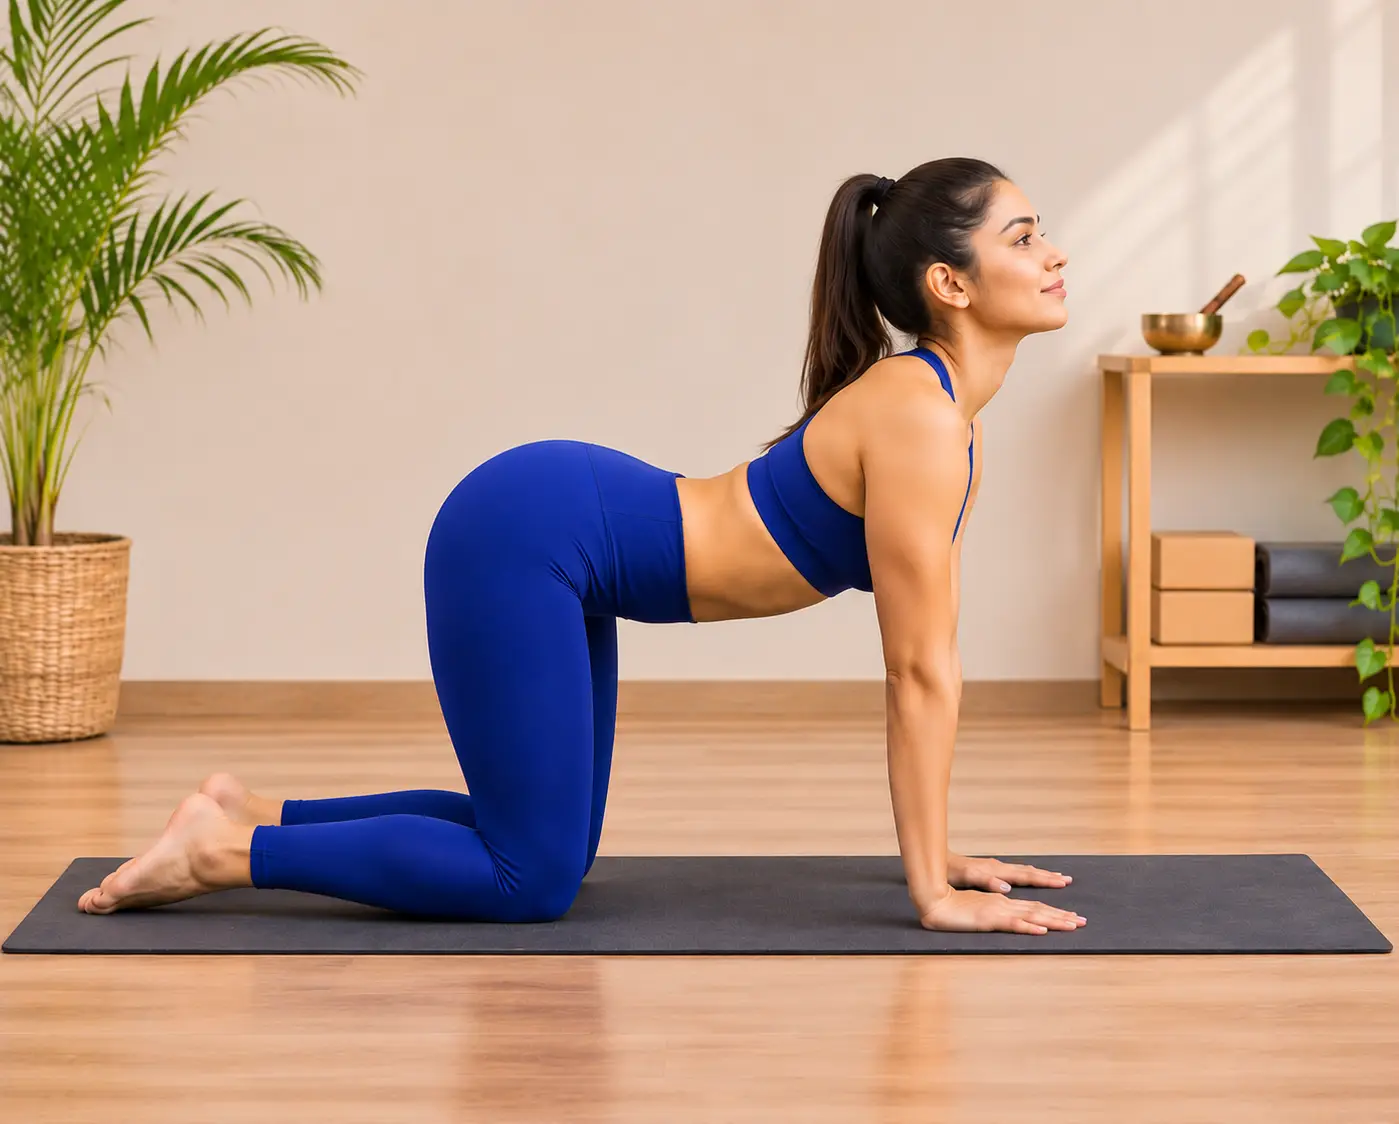
Pose 2: Cat Cow Stretch (Marjaryasana Bitilasana)
This paired movement combines Marjaryasana (Marjary meaning "cat") and Bitilasana (Bitila meaning "cow"). Together, they create a gentle, dynamic warmup that warm up the spine through rhythm and breath. In yogic traditions, this sequence is used to awaken the energy along the central channel (Sushumna Nadi) while unsticking stiff spinal segments after long hours of sitting.
Target Muscles and Joint Actions: Spinal erectors, rectus abdominis, serratus anterior, and neck flexors/extensors. Encourages full spinal flexion and extension synchronized with respiratory movement.
Step by Step Entry
Begin on your hands and knees in a tabletop position with wrists directly under shoulders and knees directly under hips.
Inhale into Cow: Drop your belly toward the mat, tilt your pelvis upward, open your chest, and lift your gaze gently toward the ceiling.
Exhale into Cat: Press firmly through your palms, round your entire spine toward the ceiling, tuck your tailbone, and draw your chin toward your chest.
Continue moving rhythmically between both shapes for 5 to 8 full breath cycles.
Common Mistakes to Avoid
Collapsing into the shoulders and sinking weight into the wrist joints.
Bending the elbows to initiate movement instead of articulating from the spine.
Over-extending the cervical spine by aggressively cranking the neck upward in Cow.
Prop Modifications
Knee Cushion Hack: Place a folded blanket under your knees to reduce point pressure on sensitive knee caps, or place blocks under your hands if your wrists feel compressed.
Cat Pose (Marjaryasana) - Rounding the spine while keeping the hands and knees grounded.Cow Pose (Bitilasana) - Gently arching the spine and lifting the chest while maintaining a stable tabletop position.
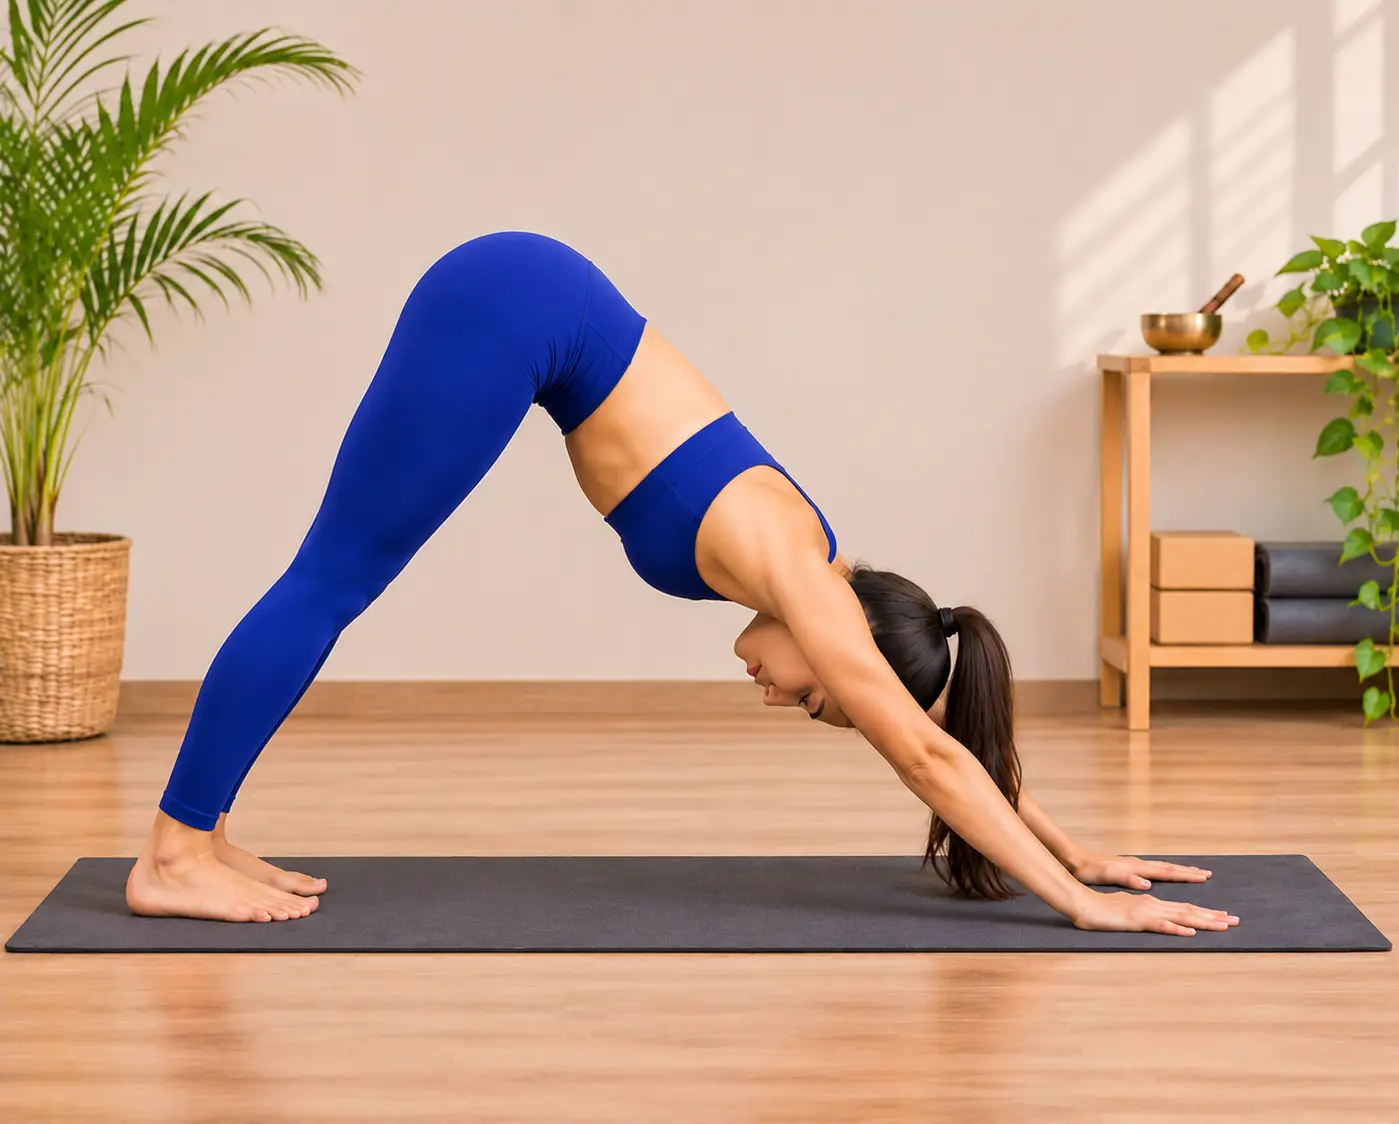
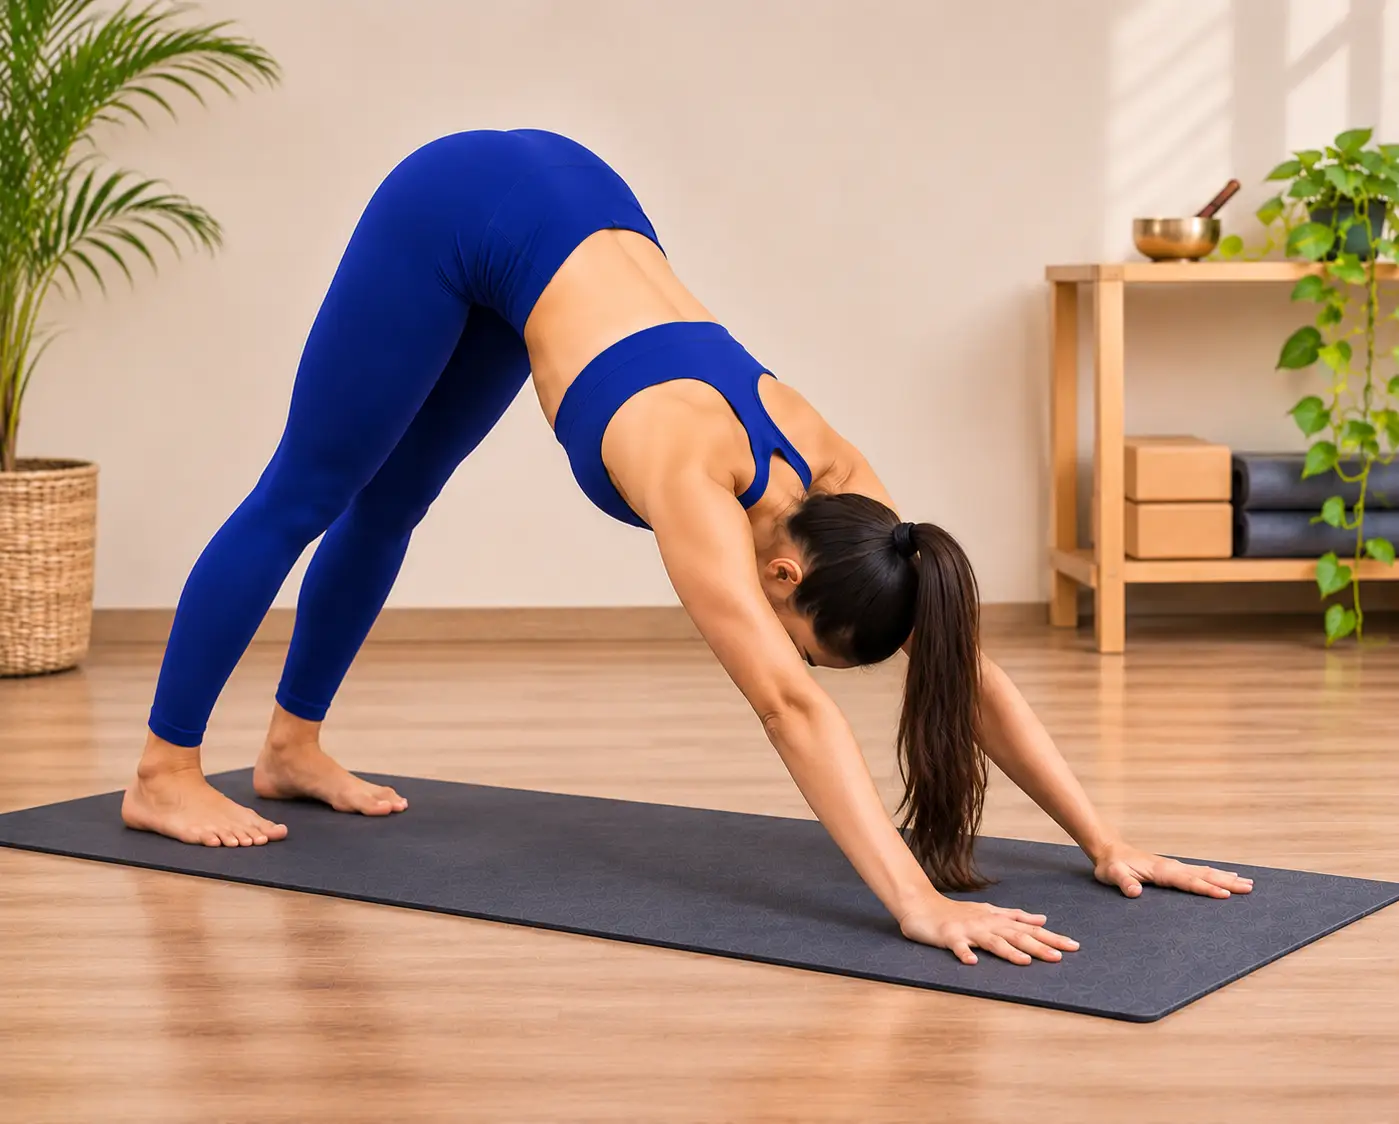
Pose 3: Downward Facing Dog (Adho Mukha Svanasana)
Derived from Adho ("downward"), Mukha ("face"), and Svana ("dog"), this posture mimics a dog stretching its full body after waking up. It is one of the most recognizable poses in yoga, functioning simultaneously as an active strength posture, a posterior stretch, and a mild inversion that brings fresh oxygenated blood to the brain.
Target Muscles and Joint Actions: Deltoids, serratus anterior, latissimus dorsi, hamstrings, gastrocnemius, and soleus. Delivers full posterior chain lengthening and gentle axial spinal decompression.
Step by Step Entry
Start in tabletop position, walk your hands one hand-length forward, and spread your fingers wide.
Tuck your toes, exhale, and press into your palms to lift your knees off the floor, sending your hips up and back.
Keep a soft bend in your knees as you lengthen your spine from your wrists to your tailbone.
Rotate your outer upper arms back toward your feet to broaden across the upper back.
Press your thighs back and lower your heels gently toward the floor without rounding your back.
Common Mistakes to Avoid
Forcing the heels to touch the floor at the expense of a rounded lower back.
Dumping all body weight into the wrists rather than distributing force into the knuckles.
Scrunching the shoulders up toward the ears, compressing the neck.
Hand Elevation Hack
Inner Thigh Block Hack: Place two yoga blocks on their lowest height flat against a wall, resting your hands on them. Elevating your hands reduces wrist compression and relieves extreme hamstring pull.
Downward-Facing Dog (Adho Mukha Svanasana) - Lengthening the spine and lifting the hips to form an inverted V shape.Downward-Facing Dog (Adho Mukha Svanasana) - A three-quarter view showing hand placement, extended arms, and the raised hips.
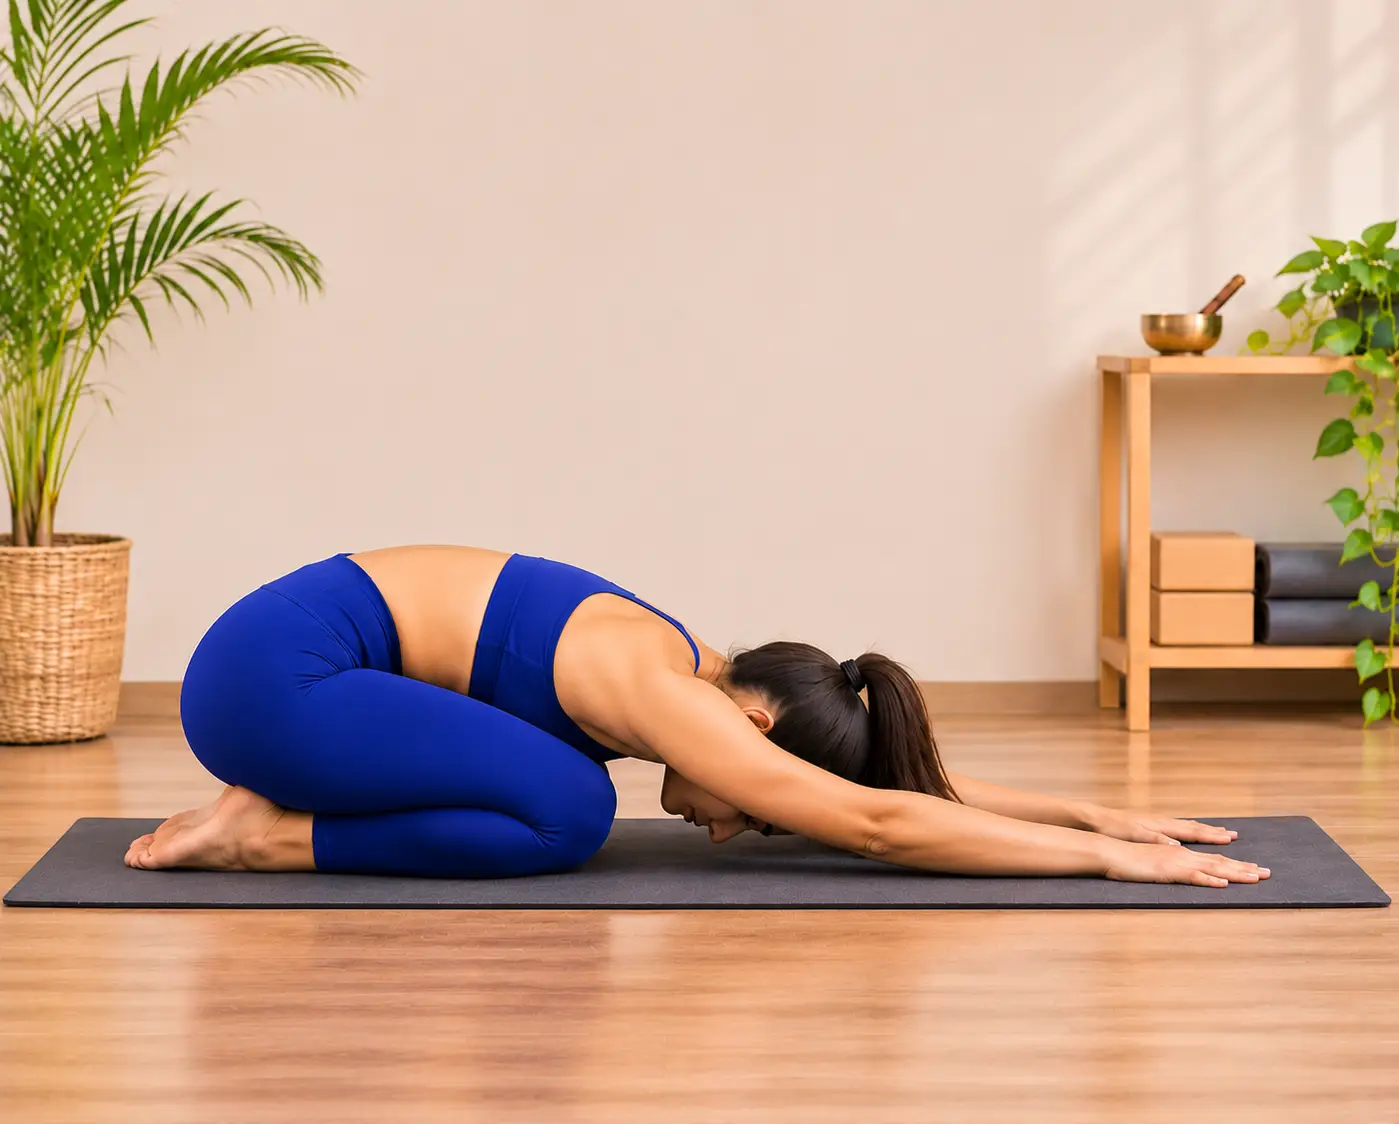
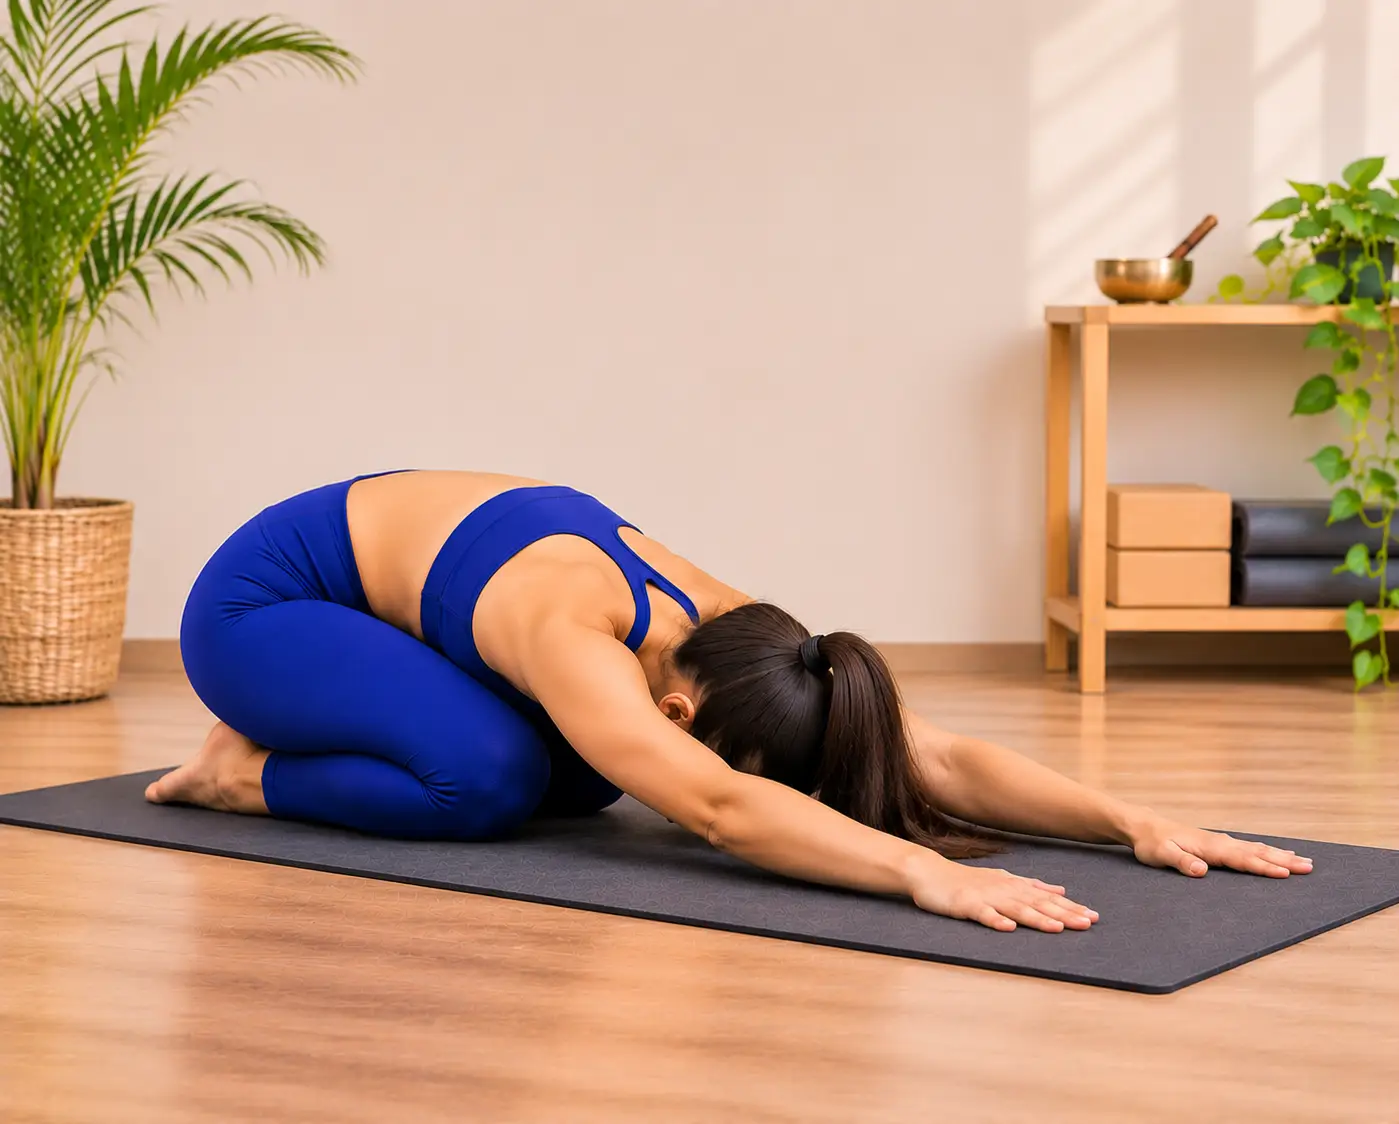
Pose 4: Child Pose (Balasana)
Balasana translates from Bala, meaning "child" or "young." It reflects a state of surrender, safety, and deep inward focus. In any yoga practice, Child Pose acts as a reset button, an accessible resting position you can return to whenever you feel overwhelmed, short of breath, or fatigued during a session.
Sanskrit and Anatomy Focus
Sanskrit Name: Balasana (bah-LAHS-ah-nah)
Target Muscles and Joint Actions: Gluteus maximus, piriformis, latissimus dorsi, and ankle extensors. Induces passive hip flexion, gentle lumbar stretching, and parasympathetic vagus nerve activation.
Step by Step Entry
Kneel on the floor, bring your big toes to touch, and separate your knees wider than hip-width.
Sit your hips back onto your heels.
Exhale as you fold your torso forward, lengthening your spine and resting your forehead gently onto the mat.
Extend your arms out in front of you with palms facing down, or drape them alongside your thighs with palms facing up.
Breathe deeply into your back ribs, allowing your belly to relax between your thighs.
Common Mistakes to Avoid
Elevating hips high in the air when hip flexors are tight, straining the neck.
Forcing the buttocks down onto heels when knee joints feel pinched.
Prop Modifications
Head and Hip Elevation Hack: Rest your forehead on a foam block if it does not reach the mat comfortably. Place a bolster across your calves behind your knees to cushion tight knee joints.
Child Pose (Balasana) - A gentle resting posture with the hips resting on the heels and arms extended forward.Child Pose (Balasana) - A relaxing yoga posture with the torso folded over the thighs and arms stretched forward.
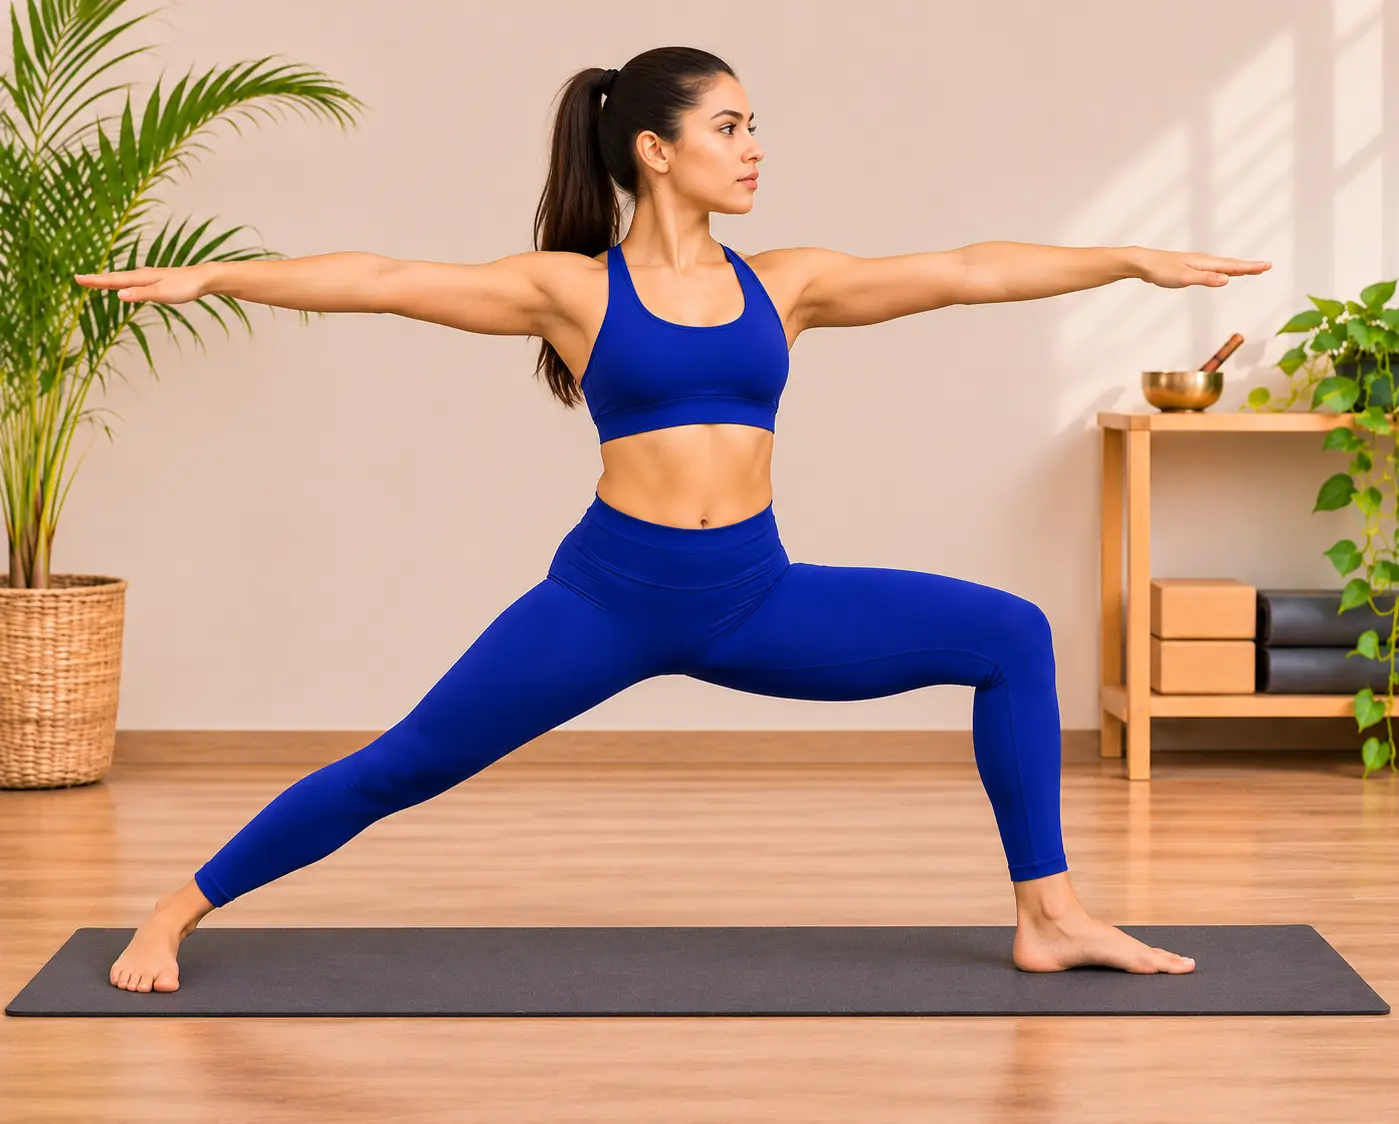
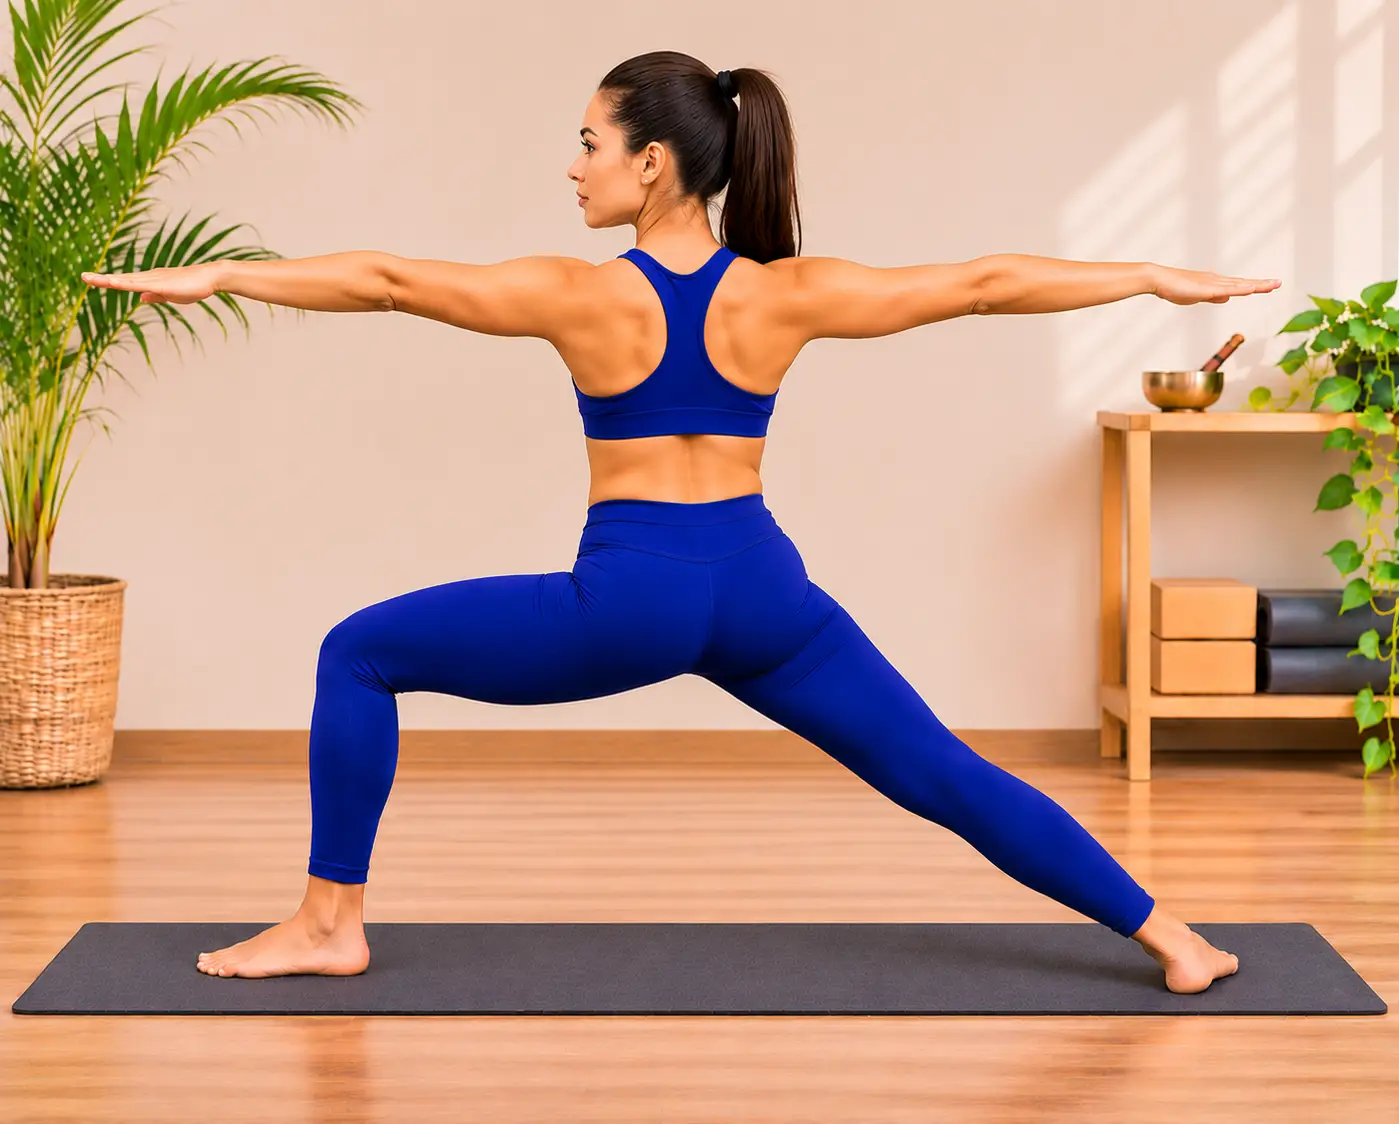
Pose 5: Warrior II (Virabhadrasana II)
Named after Virabhadra, a powerful mythical warrior from Hindu mythology, this pose embodies fierce concentration, stability, and grace. Unlike passive stretches, Warrior II builds inner fortitude and physical endurance, anchoring your lower body into the earth while opening your chest and upper body wide.
Sanskrit and Anatomy Focus
Sanskrit Name: Virabhadrasana II (veer-ah-bah-DRAHS-ah-nah two)
Target Muscles and Joint Actions: Quadriceps, gluteus medius, hip abductors, deltoids, and core stabilizers. Builds hip external rotation, pelvic stability, and isometric leg endurance.
Step by Step Entry
Step your feet wide apart (about 3.5 to 4 feet).
Turn your front foot out 90 degrees and pivot your back foot inward slightly (around 45 degrees).
Bend your front knee until it stacks directly over your ankle, bringing the thigh parallel to the floor.
Extend your arms parallel to the ground in opposite directions, broad across the chest.
Turn your head forward, gazing steadily over your front middle finger.
Common Mistakes to Avoid
Allowing the front knee to cave inward past the big toe line, risking knee strain.
Leaning the torso forward over the front thigh instead of keeping it upright over the pelvis.
Shrugging shoulders up toward the ears while extending arms.
Prop Modifications
Back Foot Wall Press Hack: Position your back foot so the outer edge presses firmly against a wall. The tactile feedback provides balance and teaches the outer hip to anchor down securely.
Warrior II Pose (Virabhadrasana II) - A standing yoga posture that builds strength and stability with arms extended and the front knee bent.Warrior II Pose (Virabhadrasana II) - A back view highlighting the extended arms, wide stance, and alignment of the legs.
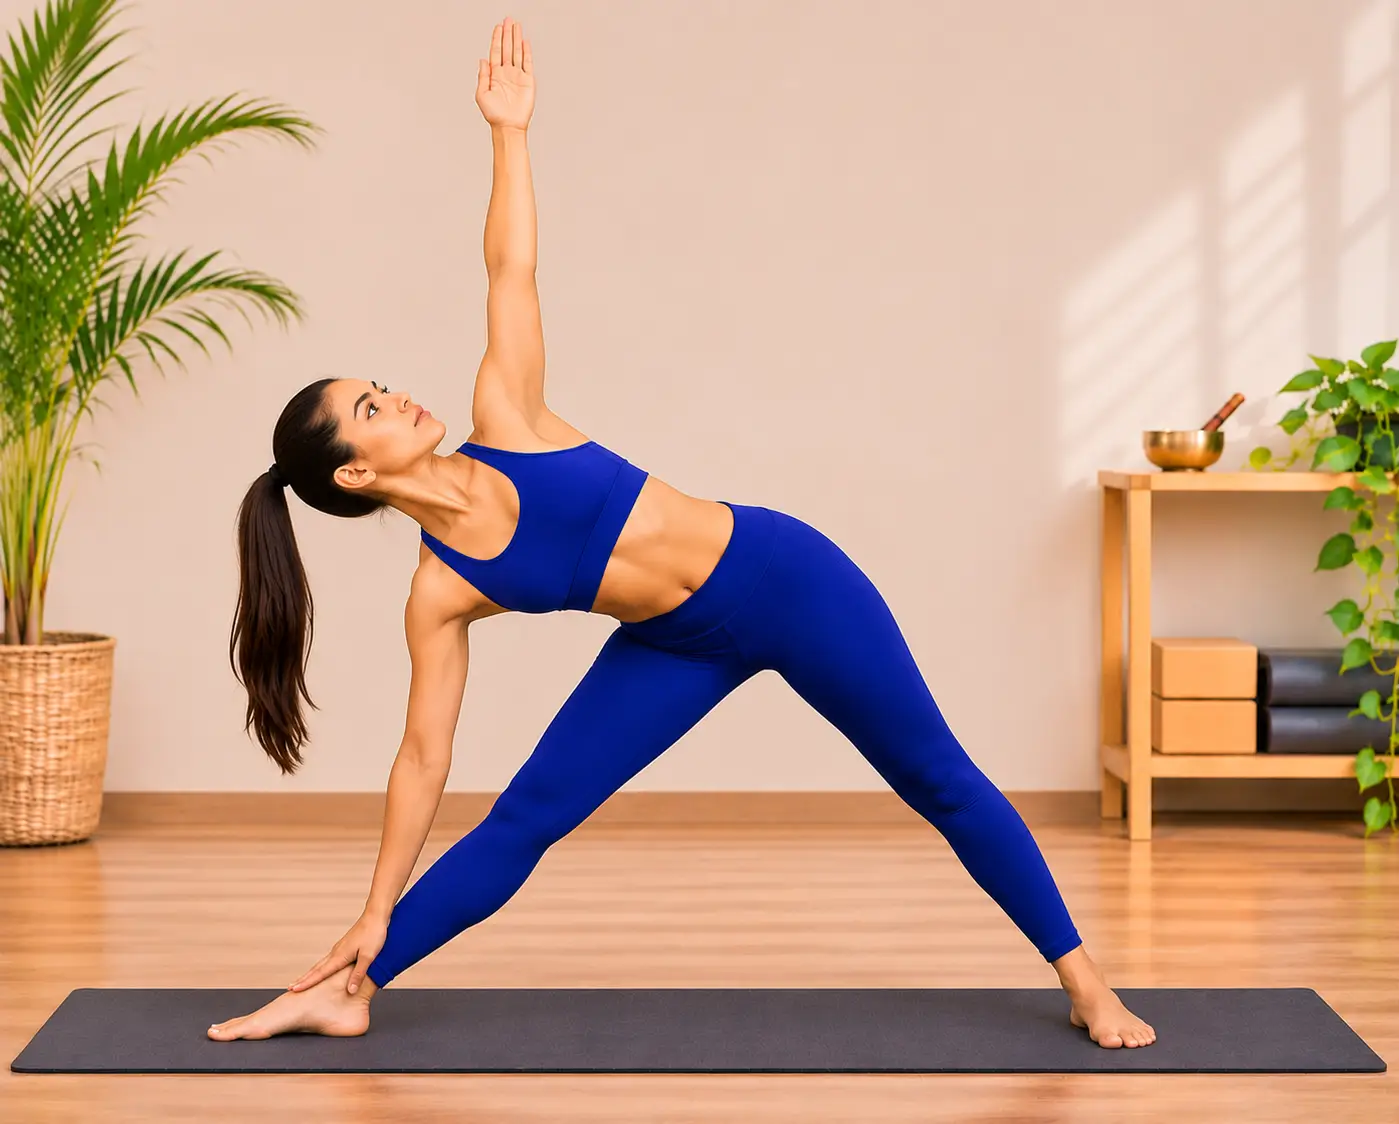
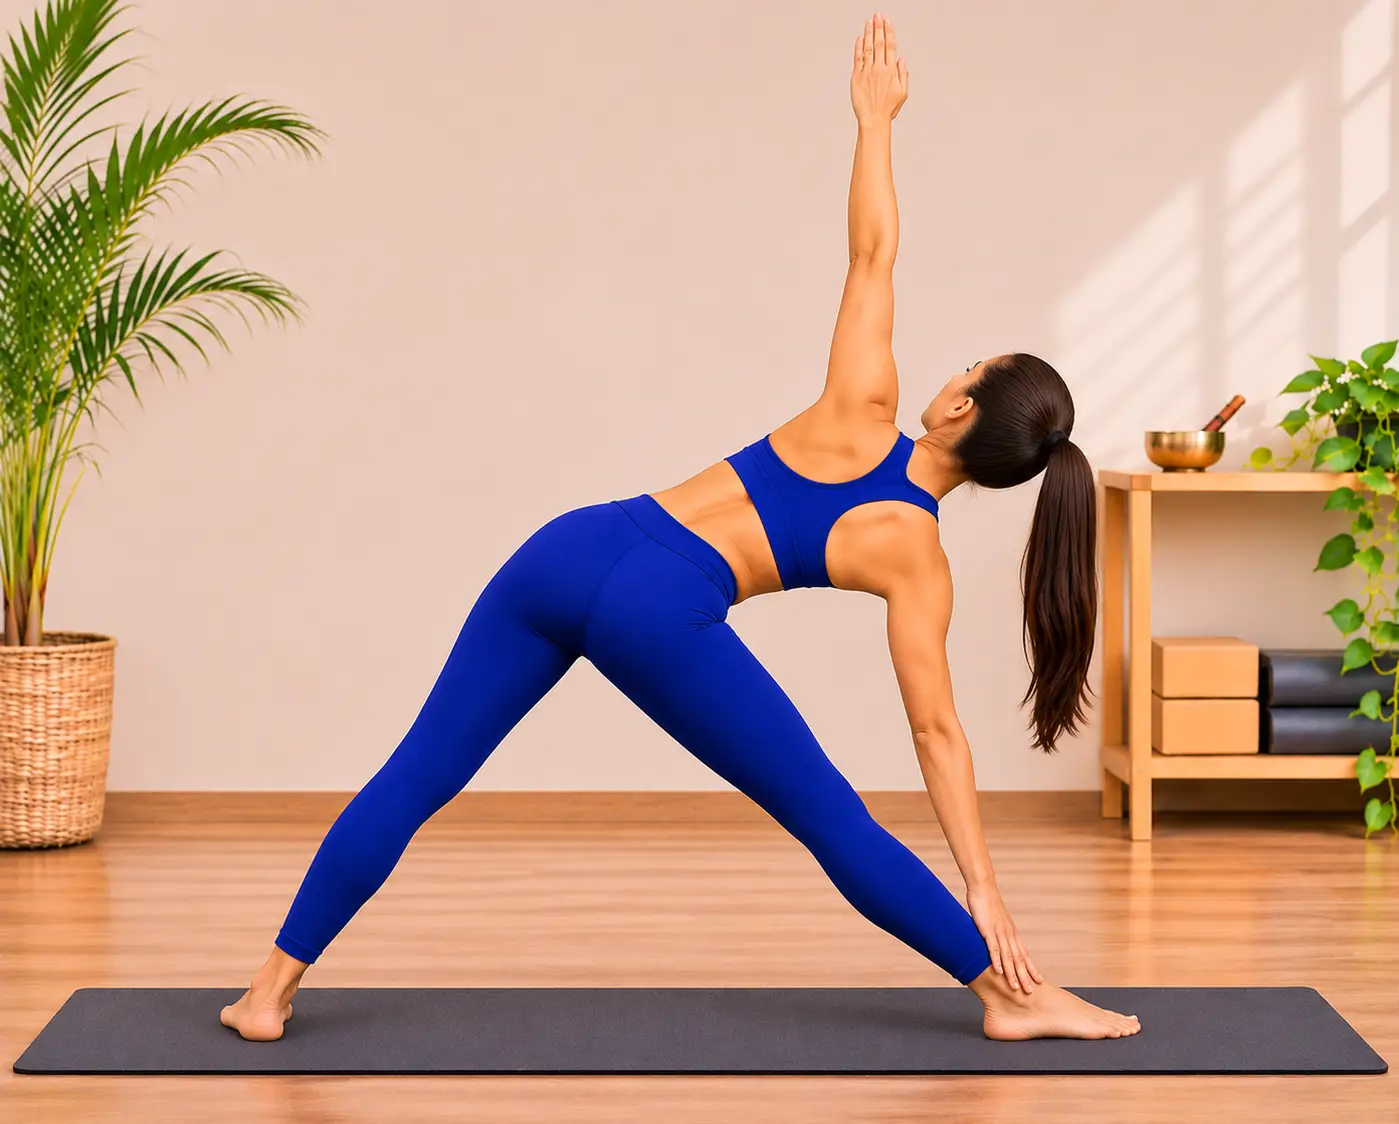
Combining Utthita ("extended") and Trikona ("triangle"), this pose uses geometric angles to create balance throughout the body. Triangle Pose challenges your core, stretches tight hamstrings, and opens up compressed waistlines, teaching you how to extend in multiple directions at once without losing grounding.
Target Muscles and Joint Actions: Internal and external obliques, hamstrings, adductors, quadriceps, and thoracic spine rotators. Improves lateral spinal flexibility and hamstring range.
Step by Step Entry
Stand with your feet wide, front foot pointing forward and back foot angled inward slightly.
Extend both arms out horizontally at shoulder height.
Inhale to lengthen your spine, then hinge at your front hip, reaching your front arm as far forward as possible.
Lower your bottom hand down to rest on your shin, ankle, or a block placed on the outside of your ankle.
Extend your top arm straight up toward the ceiling, turning your torso open and gazing toward your top hand.
Common Mistakes to Avoid
Rounding the upper spine forward to force the bottom hand to reach the mat.
Locking out the front knee joints completely (hyper-extension).
Collapse of weight into the lower hand, causing side body compression.
Prop Modifications
Block Support Hack: Place a block at high height outside your front ankle. Resting your hand securely on the block keeps both sides of your waist long and open.
Extended Triangle Pose (Utthita Trikonasana) - Front ViewExtended Triangle Pose (Utthita Trikonasana) - Back View
Pose 7: Tree Pose (Vrksasana)
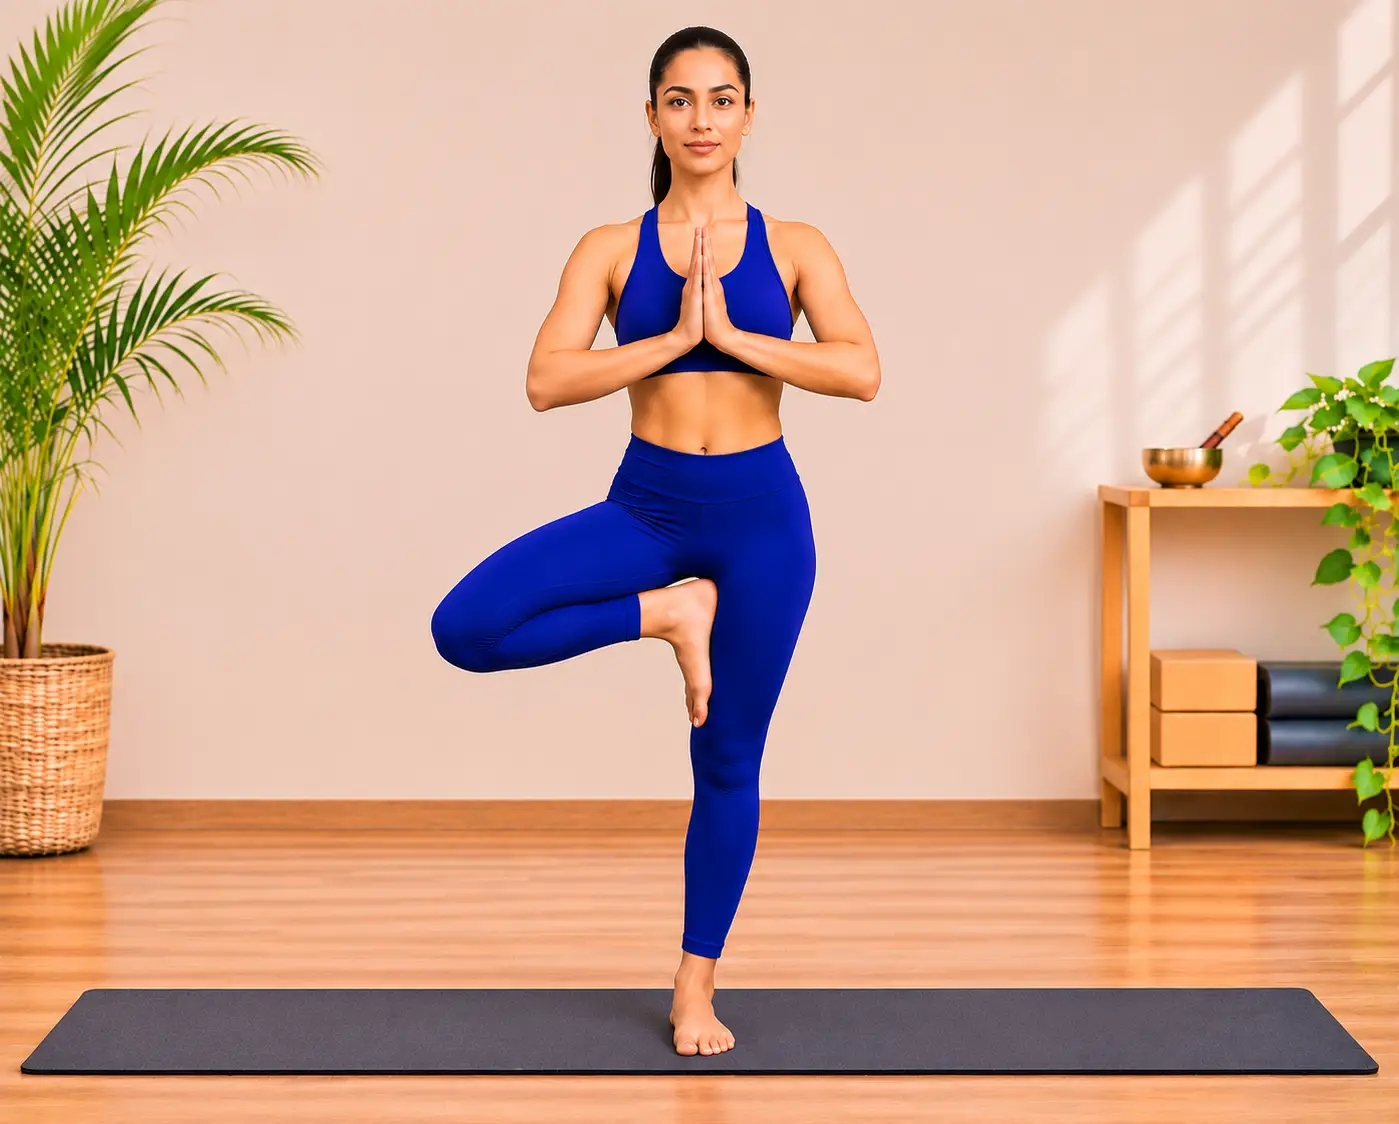
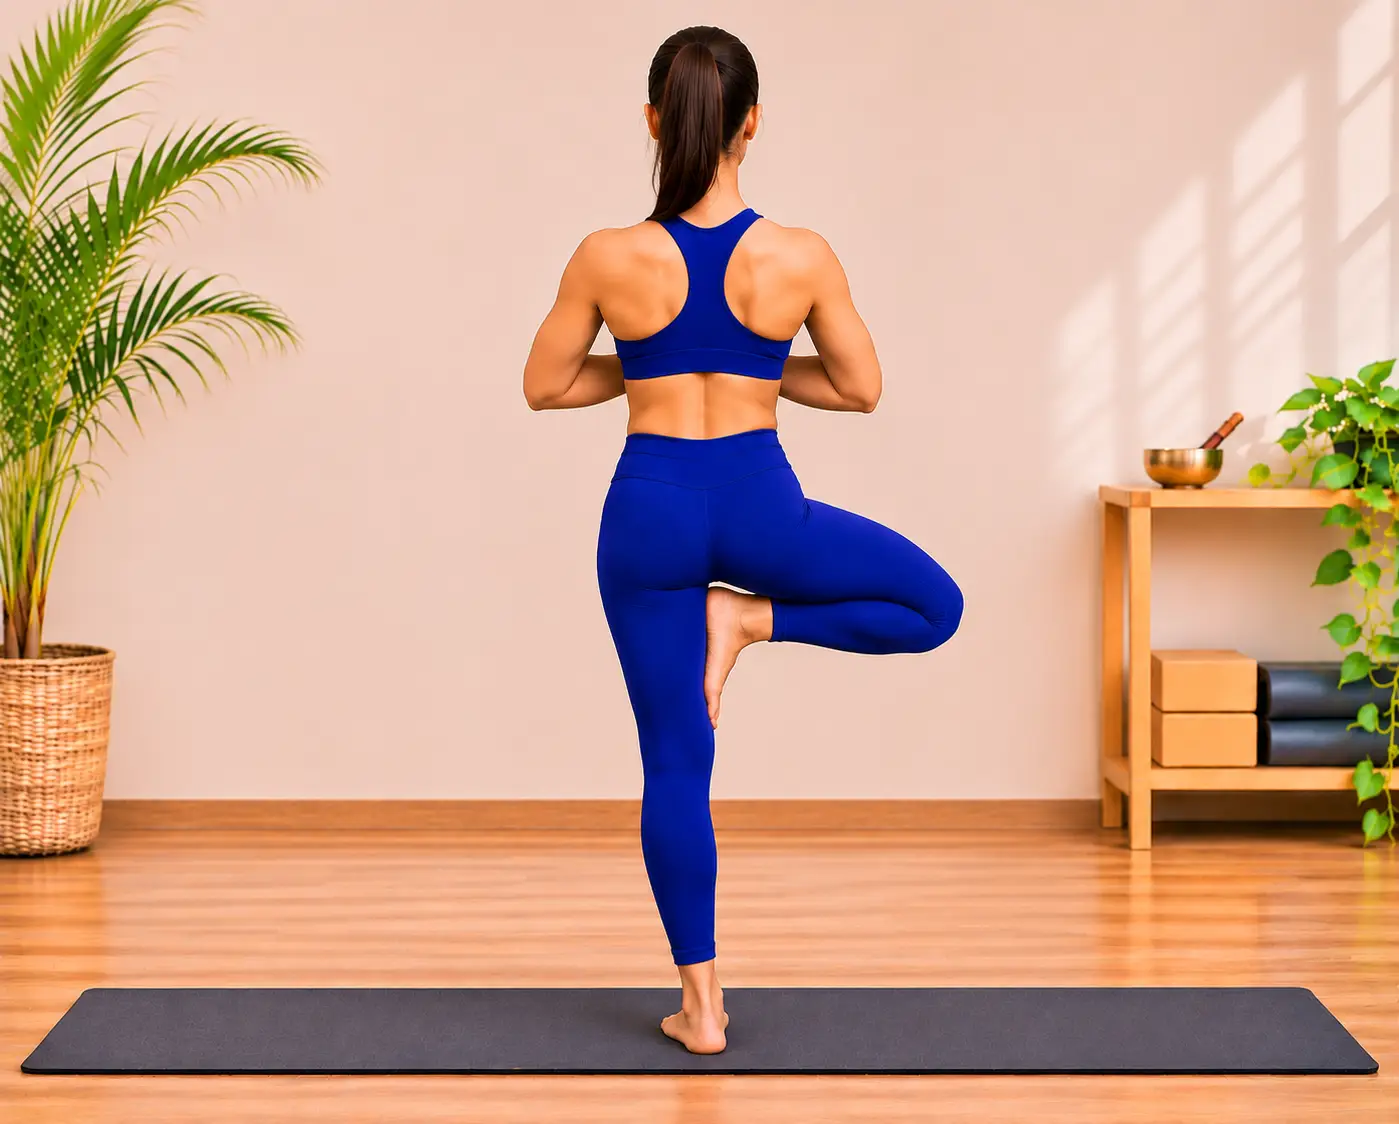
Vrksa translates to "tree," making Vrksasana an embodiment of rooting down to grow upward. Tree Pose is often a beginner's first introduction to standing on one leg. It teaches you how to embrace minor wobbles as natural adjustments while cultivating steady focus (Drishti) and single-leg balance.
Sanskrit and Anatomy Focus
Sanskrit Name: Vrksasana (vrik-SHAHS-ah-nah)
Target Muscles and Joint Actions: Ankle stabilizers, calf complex, gluteus medius, inner thigh adductors, and deep core. Develops unilateral balance, foot grounding, and hip mobility.
Step by Step Entry
Begin in Mountain Pose, shifting your weight onto your left foot while keeping the leg strong.
Bend your right knee, open the knee outward, and place the sole of your right foot against your inner left ankle, calf, or inner thigh.
Press your standing leg and foot sole firmly against each other.
Bring your hands together at heart center or reach them overhead like branches.
Fix your gaze (drishti) on an unmoving spot a few feet in front of you.
Common Mistakes to Avoid
Placing the sole of the lifted foot directly onto the inner knee joint, creating lateral joint pressure.
Allowing the standing hip to swing outward instead of keeping it pulled into center line.
Prop Modifications
Wall Touch Hack: Stand next to a wall so one shoulder or set of fingertips can lightly rest against it to maintain equilibrium while building foot stability.
Tree Pose (Vrksasana) - A standing balance posture with one foot placed against the inner thigh and palms pressed together at the chest.Tree Pose (Vrksasana) - A back view showing the balanced standing posture, bent knee, and upright spine.
Pose 8: Bound Angle Pose (Baddha Konasana)
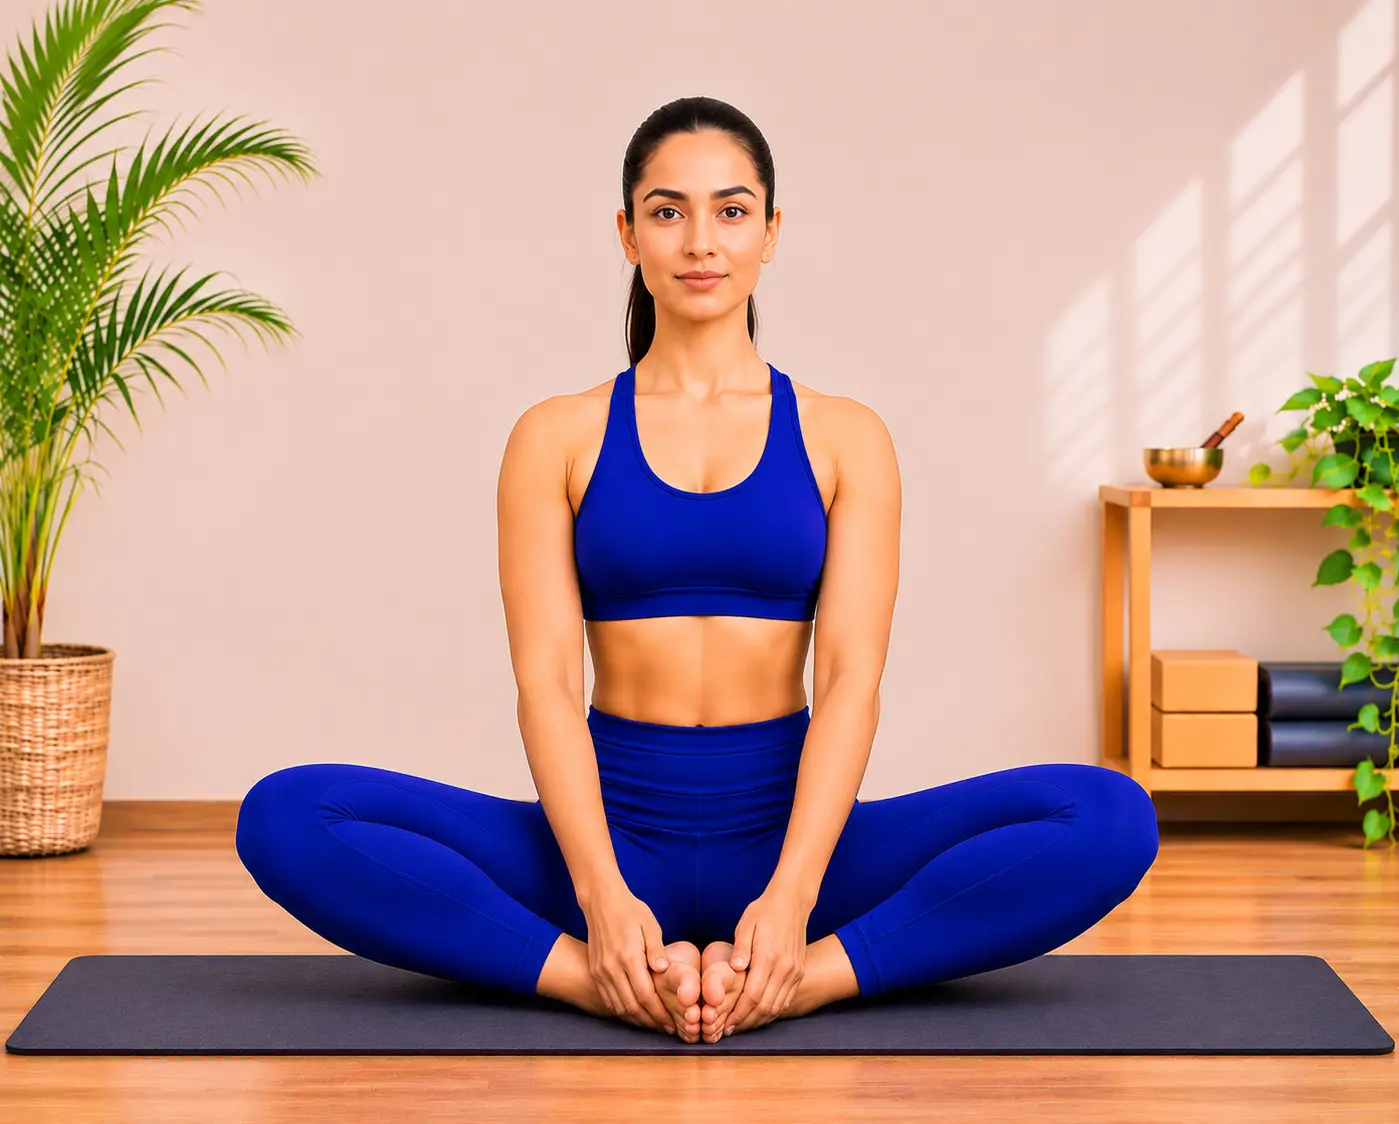
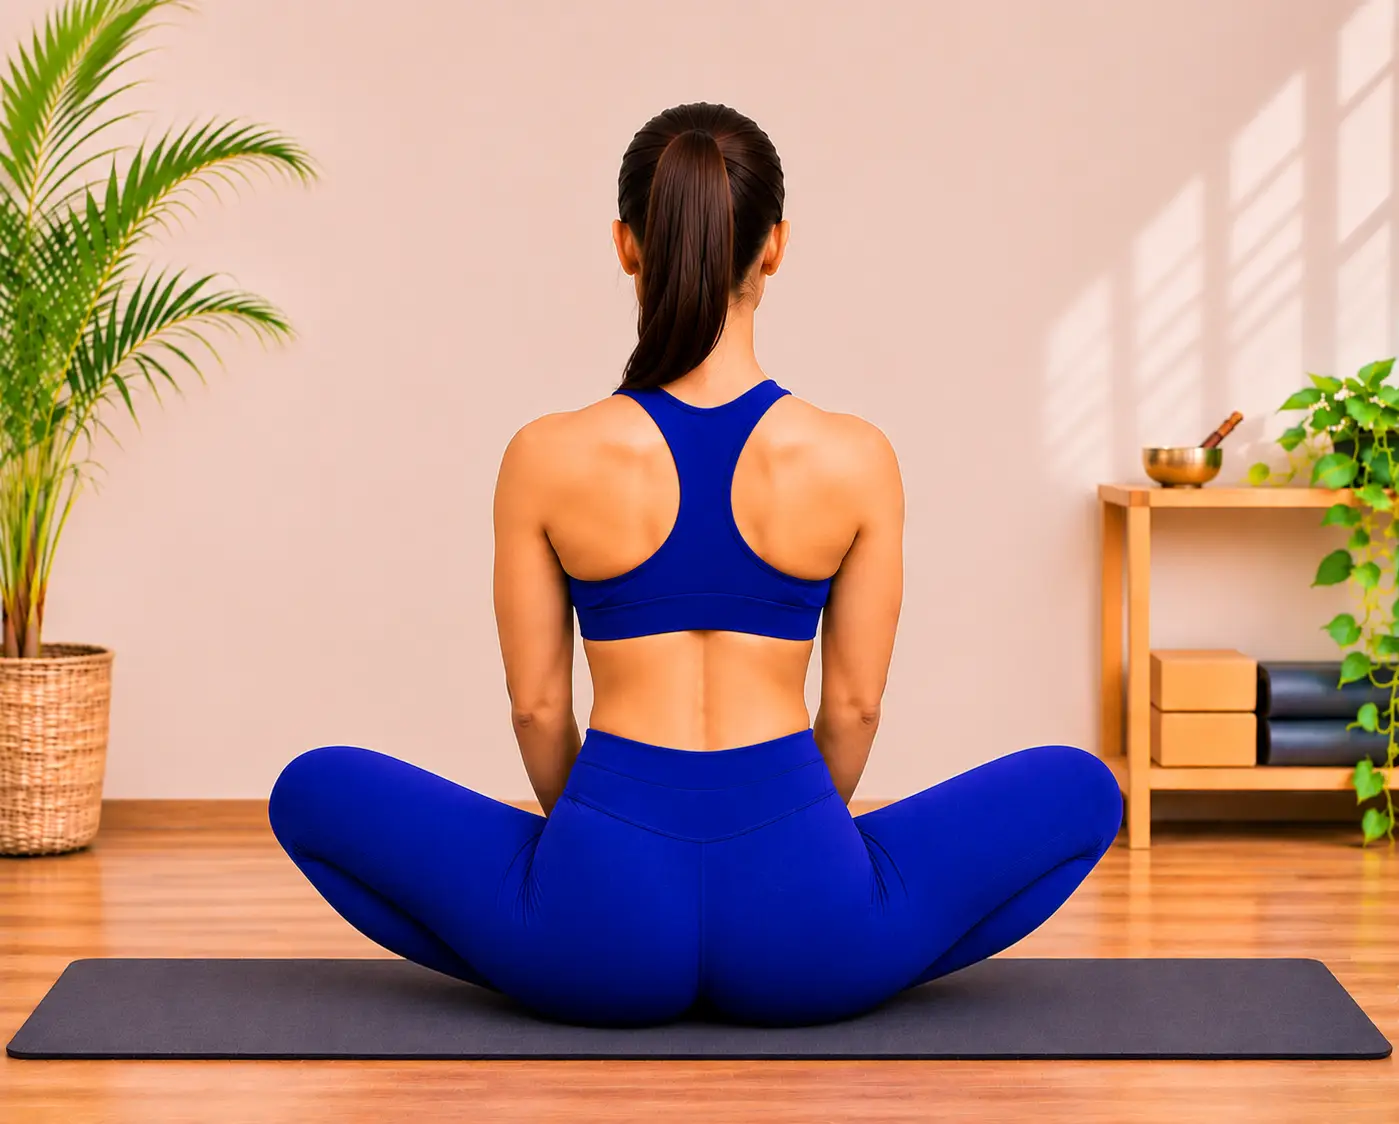
Baddha means "bound" and Kona means "angle." Commonly referred to as Butterfly Pose or Cobbler's Pose, this seated posture opens up the inner thighs and groins after long periods of sitting, bringing gentle circulation to the pelvic area.
Target Muscles and Joint Actions: Adductor muscle group, hip flexors, inner groin, and erect posture stabilizers. Relieves groin tightness and restores natural pelvic tilt.
Step by Step Entry
Sit upright on your mat with your legs extended forward.
Bend your knees, draw your heels toward your pelvis, and drop your knees open to the sides.
Press the soles of your feet together, grasping your ankles or feet with your hands.
Inhale to sit tall, lifting through the crown of your head while softening your shoulders down.
Keep your spine long as you gently let your knees heavy toward the floor.
Common Mistakes to Avoid
Rounding the lumbar spine backward into a slouched shape to force the knees down.
Yanking feet forcefully toward the groin, which compresses tight knee joints.
Prop Modifications
Elevated Hip Cushion Hack: Sit on the edge of a folded blanket or foam block to elevate your hips above your knees. This tilt restores the natural lumbar curve and relaxes tight groins.
Bound Angle Pose (Baddha Konasana) - Front ViewBound Angle Pose (Baddha Konasana) - Back View
Pose 9: Bridge Pose (Setu Bandhasana)
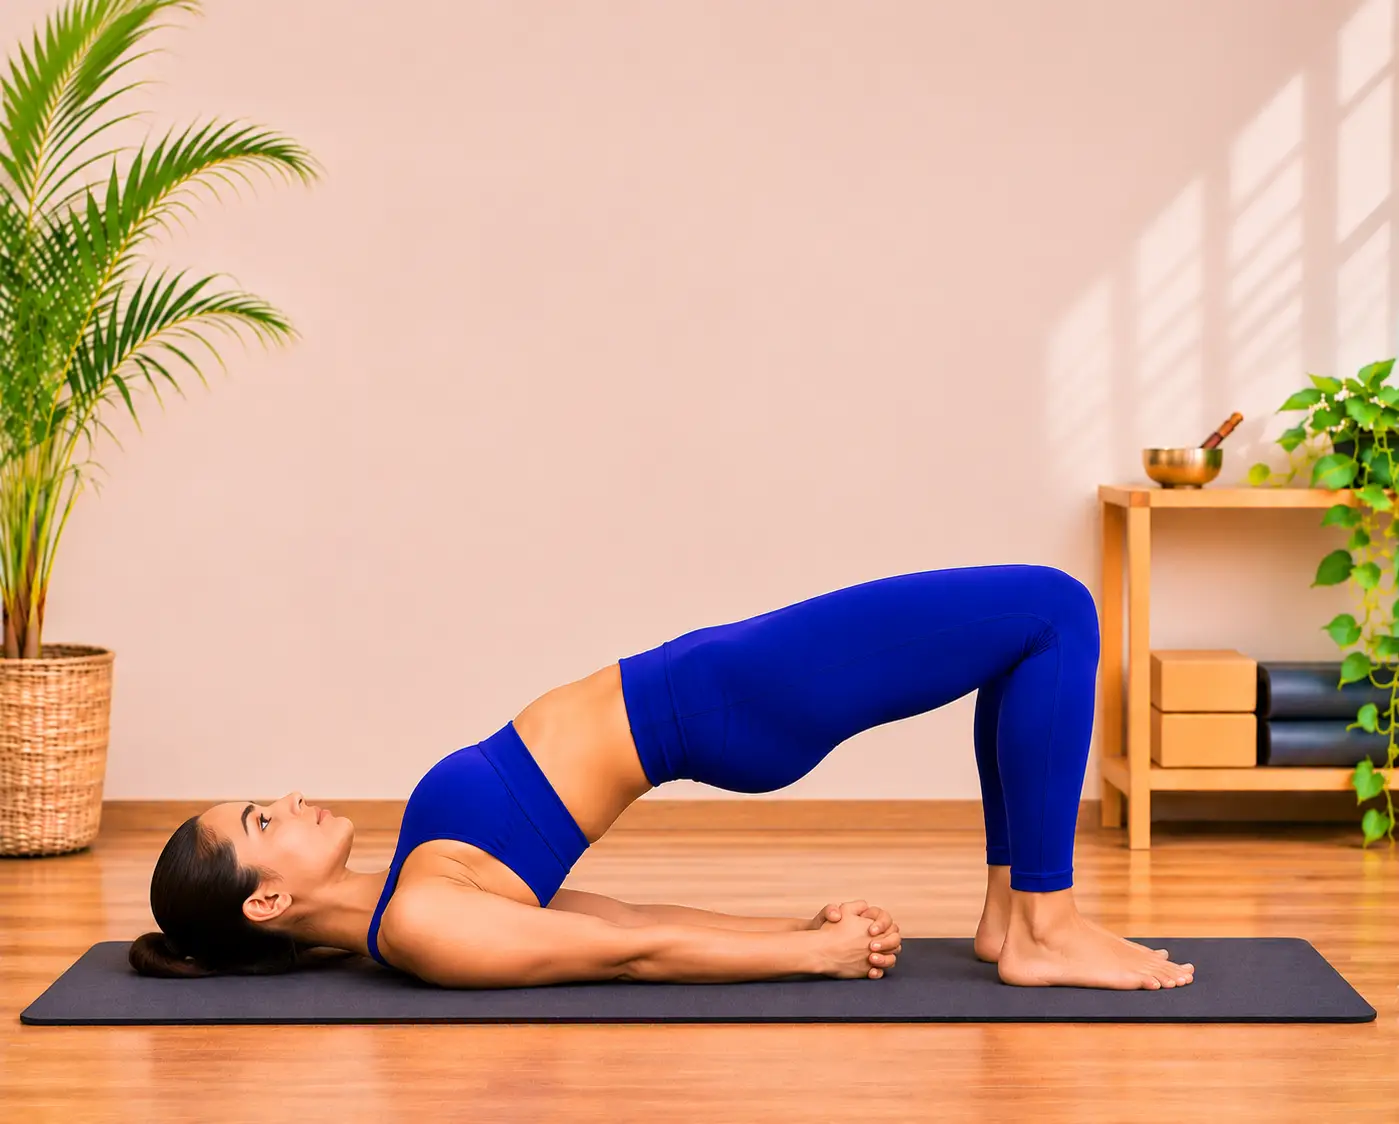
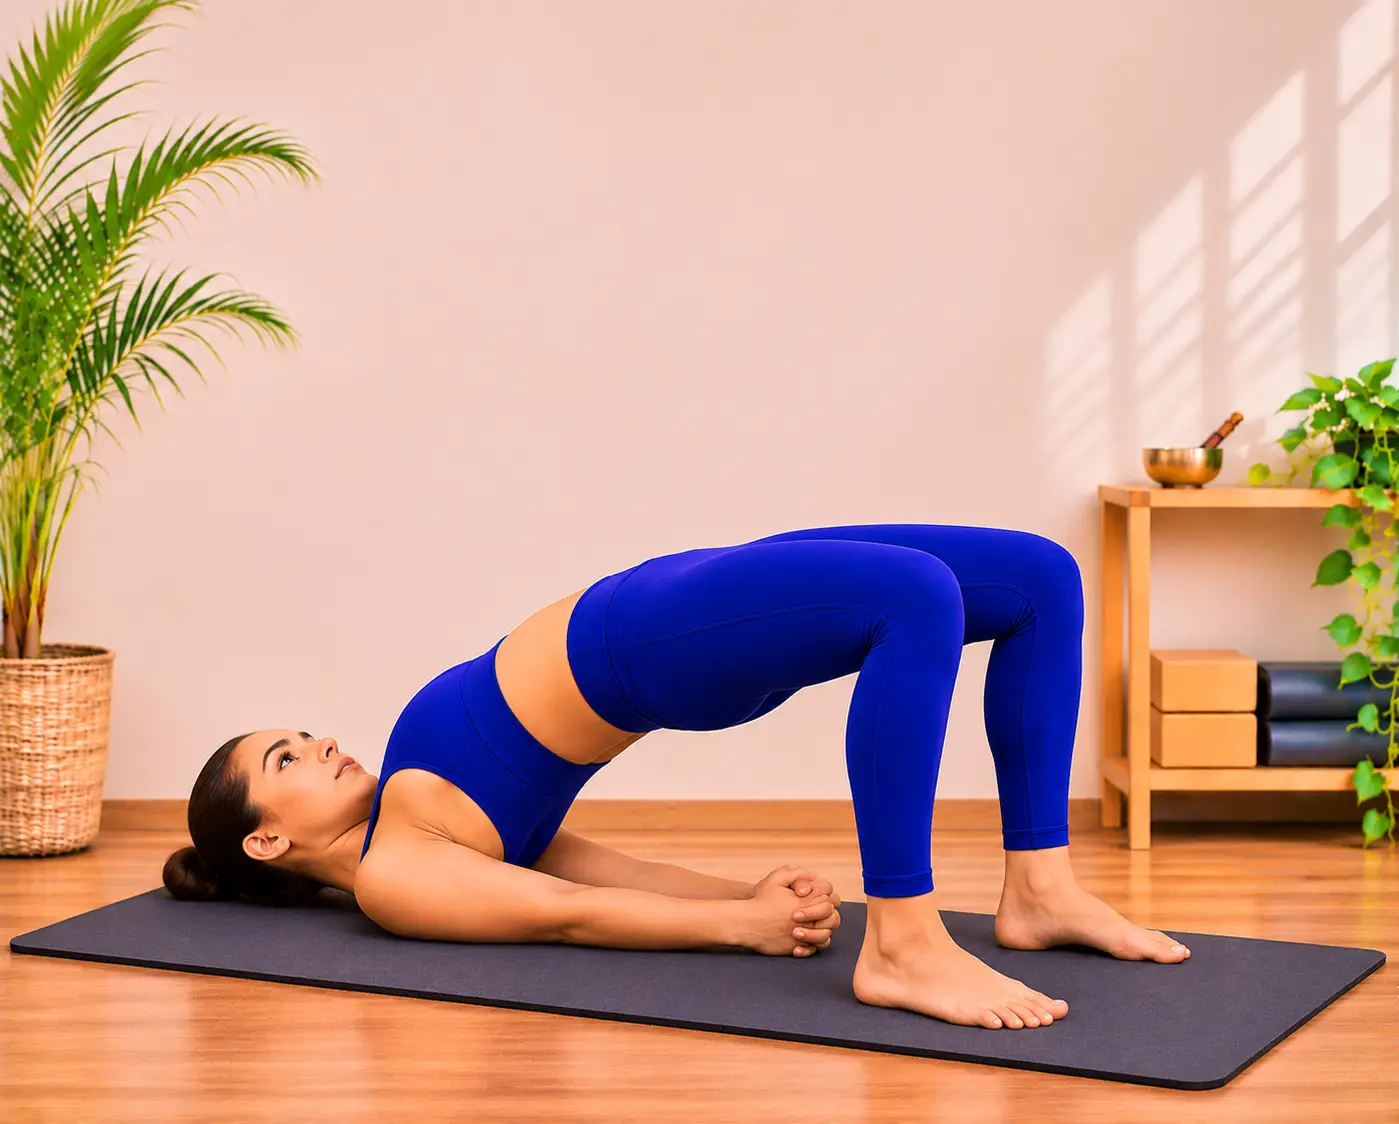
Setu means "bridge" and Bandha means "lock" or "construction." Bridge Pose builds a literal physical bridge with your body, strengthening the back muscles while opening the chest. It serves as an accessible introduction to backbends, helping reverse rounded desk posture without stressing the spine.
Target Muscles and Joint Actions: Gluteus maximus, hamstrings, quadriceps, back erectors, and chest flexors. Strengthens the posterior chain while opening the chest and front shoulders.
Step by Step Entry
Lie flat on your back with your knees bent and feet flat on the mat, hip-width apart and under knees.
Place your arms along your sides with palms facing down.
Exhale, press firmly into your feet, and lift your hips toward the ceiling.
Interlace your fingers under your lower back and roll your shoulders underneath your body to elevate your chest.
Keep your thighs parallel and hold for 5 deep breaths before rolling down slowly.
Common Mistakes to Avoid
Allowing knees to splay outward away from the pelvic line during the lift.
Turning the head from side to side while in the backbend, which can compress neck vertebrae.
Prop Modifications
Restorative Sacrum Block Hack: Slide a foam block under your sacrum (the flat bone at the base of your spine) on its lowest or medium setting for a supported restorative backbend.
Bridge Pose (Setu Bandhasana) - Lifting the hips while keeping the shoulders and feet grounded to create a gentle backbend.Bridge Pose (Setu Bandhasana) - A slightly angled view highlighting the lifted hips, bent knees, and grounded shoulders.
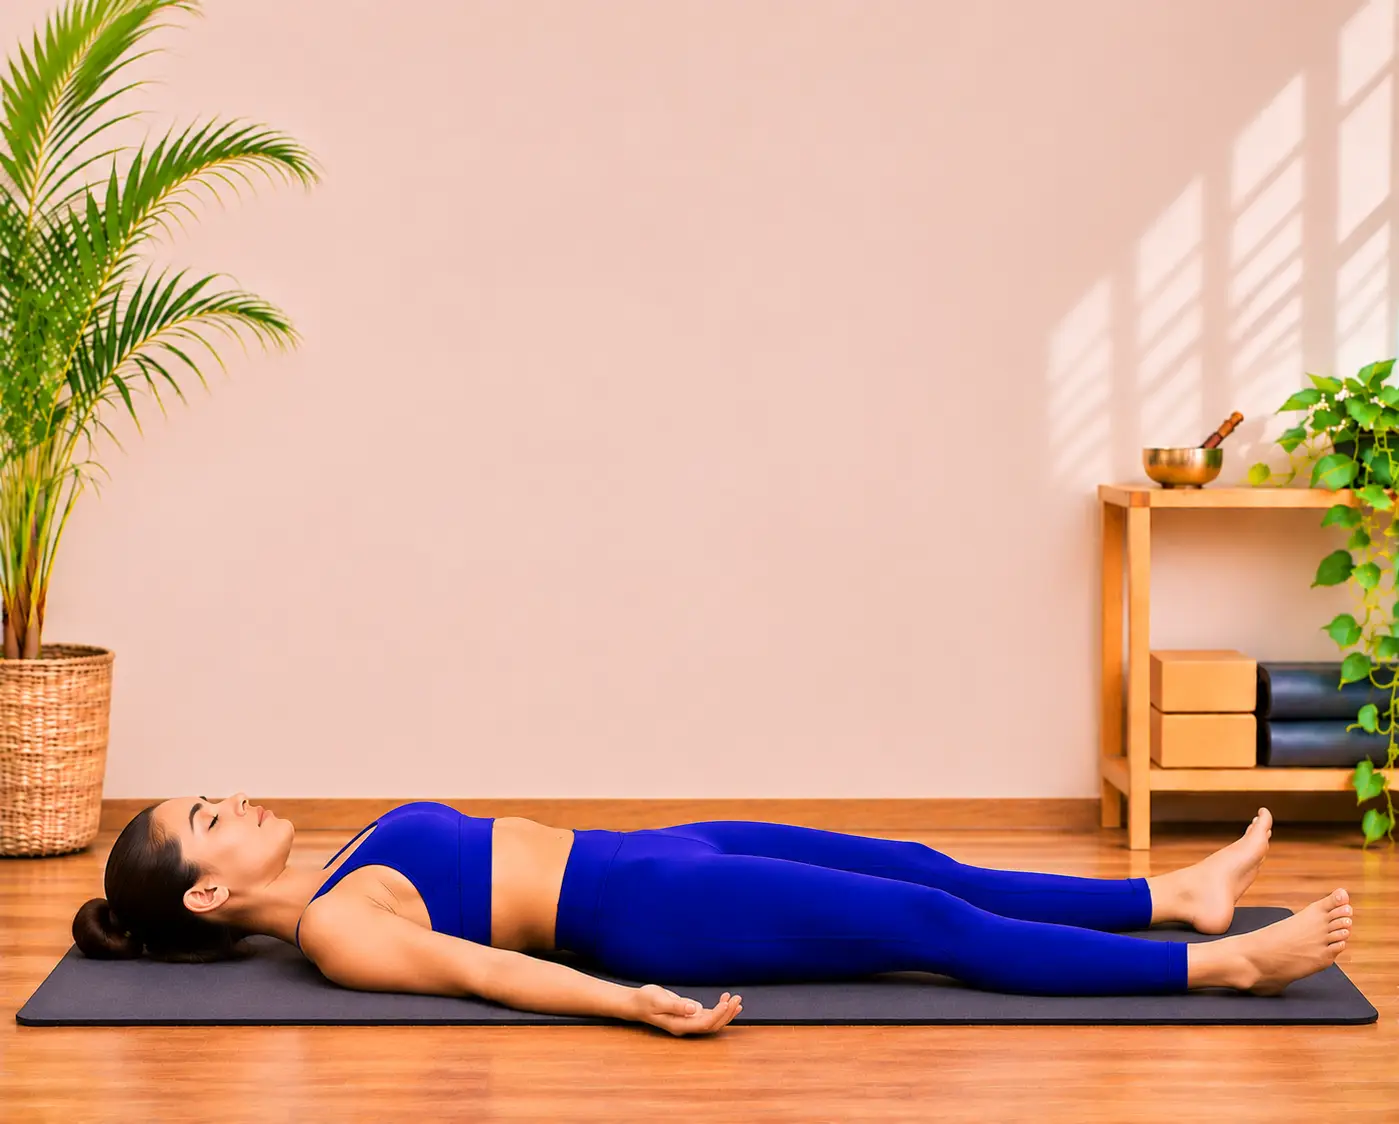
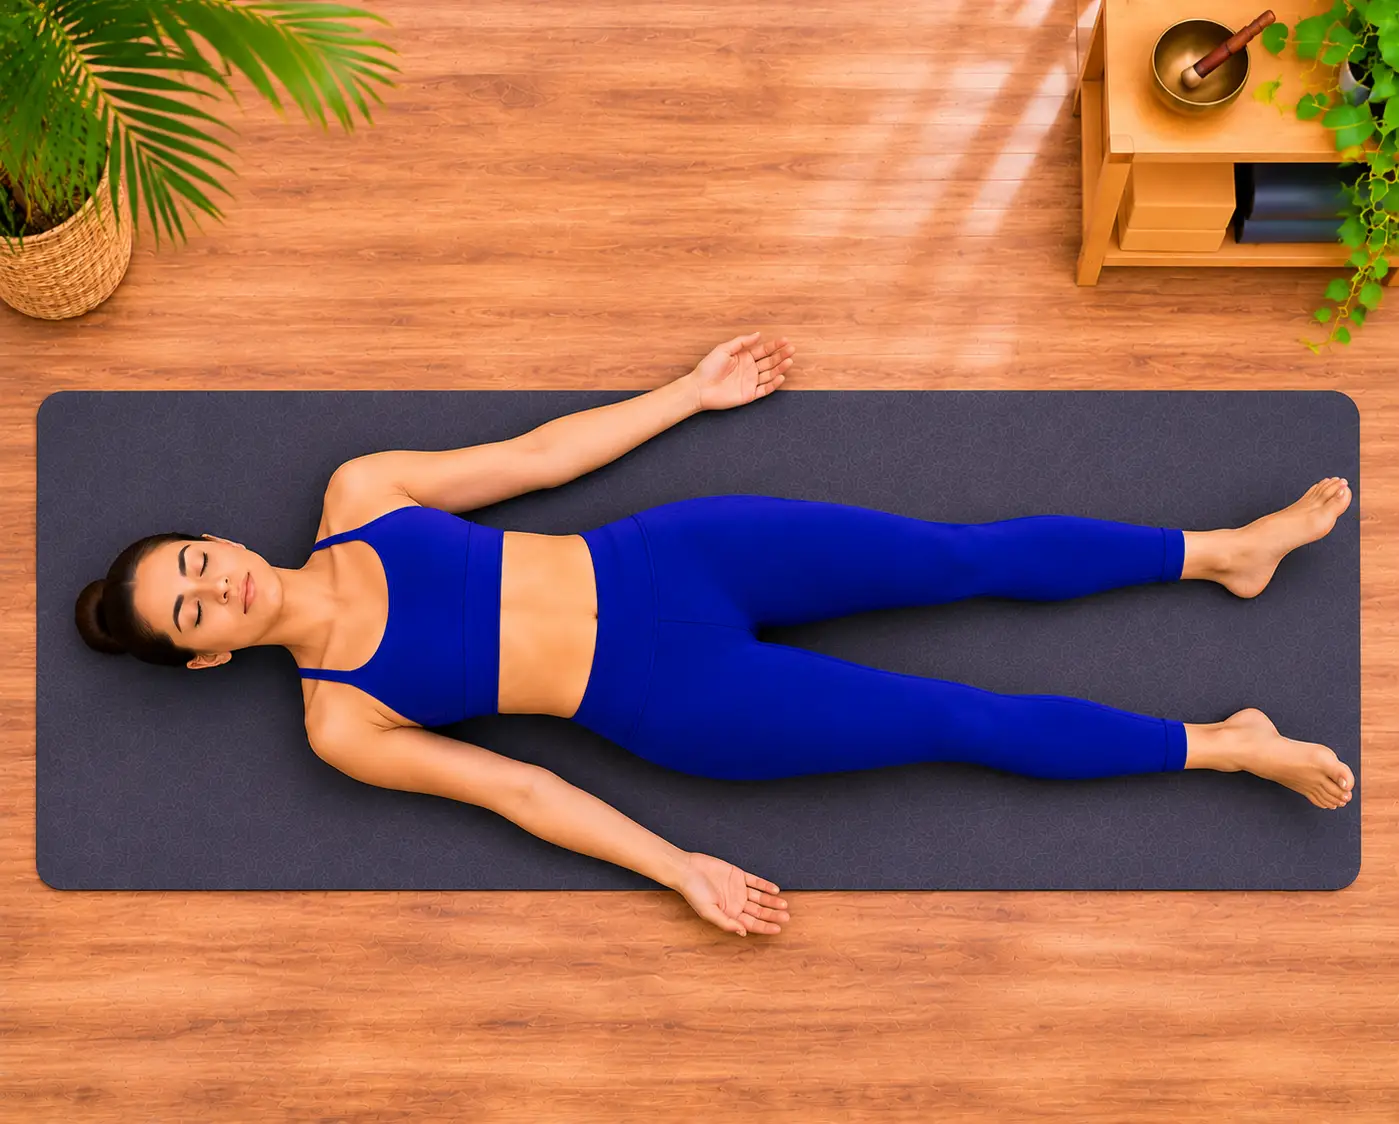
Pose 10: Corpse Pose (Savasana)
Derived from Sava (meaning "corpse"), Savasana is often considered the most important pose in all of yoga. While it appears simple, conscious relaxation requires surrender and presence. It allows your nervous system to absorb the physical benefits of your practice, shifting your mind into a deeply restful state.
Sanskrit and Anatomy Focus
Sanskrit Name: Savasana (shah-VAHS-ah-nah)
Target Muscles and Joint Actions: Total muscular relaxation. Shifts the nervous system from sympathetic (fight or flight) to parasympathetic (rest and digest) state.
Step by Step Entry
Lie flat on your back, extending your legs long and allowing your feet to drop open naturally.
Rest your arms alongside your body, slightly away from your torso with palms facing upward.
Release all muscular control, allowing your weight to sink completely into the mat.
Soften your jaw, release the tongue from the roof of your mouth, and close your eyes softly.
Rest completely in stillness for 5 to 10 minutes.
Common Mistakes to Avoid
Skipping this posture or rushing off the mat early before the nervous system recalibrates.
Trying to strictly control your breath rather than letting it return to a natural rhythm.
Prop Modifications
Under Knee Bolster Hack: Place a rolled blanket or bolster directly underneath your knees. This slight knee elevation slackens tight hip flexors and releases tension in the lower back.
Corpse Pose (Savasana) - A restorative resting posture with the body relaxed, arms resting beside the torso, and legs extended on the mat.Corpse Pose (Savasana) - An overhead view of the final relaxation posture, with the body resting naturally on the yoga mat.
POSTURAL SAFETY
Common Alignment Errors to Avoid
When beginning a yoga practice, building safe movement patterns is far more important than forcing your body into extreme ranges of motion. Many common beginner habits stem from trying to look flexible rather than focusing on internal alignment and stability. By catching and correcting these four widespread alignment errors early, you protect your joints, prevent strain, and ensure every pose delivers its intended benefits.
Over-Arching the Lower Back
A common mistake in standing postures like Mountain Pose and backbends like Bridge Pose is dumping weight into the lumbar spine to create the illusion of depth or openness. When you flare your ribcage and arch your lower back aggressively, you compress the lumbar vertebrae and disengage your abdominal wall.
The Correction: Focus on tucking your pelvis into a neutral position by gently drawing your navel toward your spine and lengthening your tailbone down toward your heels. Engaged core muscles support your back and distribute movement evenly across your entire spine.
Forcing Heels to the Floor in Downward Dog
In Downward-Facing Dog, many beginners treat getting their heels flat on the mat as the ultimate goal. However, forcing your heels down when your hamstrings or calves are tight causes the spine to round, shifting unwanted pressure into the shoulders, upper back, and wrists.
The Correction: Prioritize a long, straight spine over flat feet. Keep a generous bend in your knees, tilt your tailbone toward the ceiling, and focus on lengthening your torso from your palms all the way to your hips. Your heels will naturally soften toward the floor as your posterior chain opens over time.
Holding the Breath
During challenging balance poses like Tree Pose or active holds like Warrior II, beginners frequently hold their breath without realizing it. Holding your breath activates the sympathetic nervous system (the body's stress response), increasing muscle tension, raising heart rate, and making balance significantly harder to maintain.
The Correction: Maintain steady, smooth diaphragmatic breathing (Pranayama) throughout every transition and hold. If you find yourself holding your breath or gasping, back off slightly from the depth of the posture until your breath becomes smooth and consistent again.
Ignoring Pain Cues
Yoga should challenge your muscular endurance and flexibility, but it should never cause sharp or shooting sensations. Beginners often confuse deep muscular engagement or a healthy stretch with joint compression, especially in vulnerable areas like the knees, lower back, and wrists.
The Correction: Learn to distinguish between muscular sensation (a dull, warm ache in the belly of a muscle) and joint strain (sharp, pinching, or localized pain in a joint). If you feel sharp discomfort, exit the posture immediately, adjust your alignment, or use a prop modification to keep your practice safe.
HOME ROUTINE
The 20-Minute Beginner Home Practice Sequence
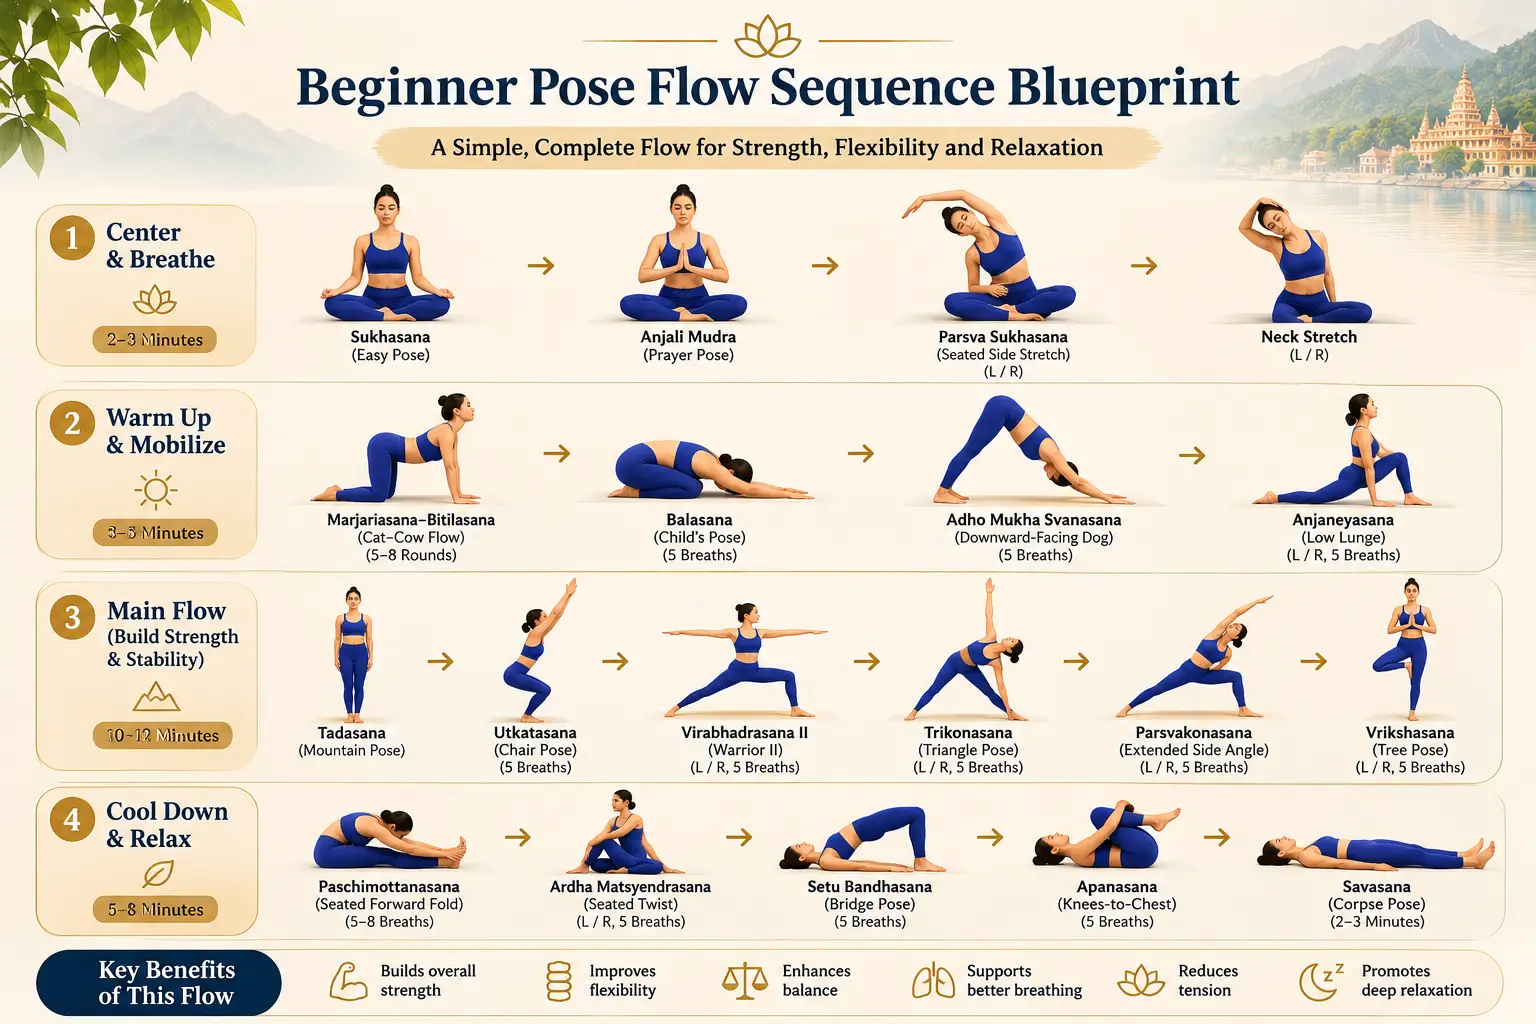
Knowing individual postures is only half the battle; knowing how to string them together into a balanced routine turns isolated shapes into a transformative daily habit. This simple 20-minute sequence connects the ten essential poses into four distinct phases designed to mobilize your spine, build standing endurance, open tight hips, and quiet the nervous system.
You do not need an hour long session to see results. Practicing this short, functional flow 3 to 4 times a week will yield noticeable improvements in posture, energy levels, and overall flexibility.
Beginner Pose Flow Sequence Blueprint - A step-by-step yoga routine combining breathing, warm-up stretches, standing poses, balance, and relaxation to support strength, flexibility, and balance
Phase 1 - Warm-Up and Centering (5 Minutes)
Goal: Transition your mind away from daily distractions, mobilize the spine, and synchronize your movement with deep diaphragmatic breathing.
Child's Pose (Balasana): 2 Minutes (8-10 Deep Breaths): Start on your mat with knees wide and big toes touching. Sink your hips back to your heels and rest your forehead on the mat or a block. Focus on expanding your ribcage with every inhale and relaxing your shoulders on every exhale.
Cat-Cow Stretch (Marjaryasana-Bitilasana): 2 Minutes (6-8 Cycles): Transition up into tabletop on hands and knees. Inhale to arch into Cow Pose, lifting your chest and tailbone; exhale to round into Cat Pose, drawing your navel to your spine. Move smoothly with the cadence of your breath.
Mountain Pose (Tadasana): 1 Minute (5 Breaths): From tabletop, press up to standing. Root down through all four corners of your feet, spread your toes, lengthen your spine, and stand tall in quiet focus.
Phase 2 - Standing Strength and Balance (8 Minutes)
Goal: Build lower body endurance, open the hips and chest, and challenge unilateral balance and focus.
Downward-Facing Dog (Adho Mukha Svanasana): 1.5 Minutes (5-6 Breaths): Step your feet back, plant your hands, and lift your hips high into an inverted V-shape. Keep knees softly bent to lengthen your spine.
Warrior II (Virabhadrasana II): 2 Minutes (5 Breaths Per Side): Step your right foot forward between your hands, pivot your back heel down 90 degrees, and open your arms parallel to the floor. Hold for 5 breaths, then switch sides.
Extended Triangle Pose (Utthita Trikonasana): 2.5 Minutes (5 Breaths Per Side): From a wide standing stance, reach your front arm forward over your right leg and lower your hand to a block or shin, reaching your left arm straight up. Hold for 5 breaths, then switch sides.
Tree Pose (Vrksasana): 2 Minutes (5 Breaths Per Side): Step back to Mountain Pose. Shift your weight onto your left leg, place the sole of your right foot against your inner left calf or thigh (avoiding the knee), and find a steady gazing point (Drishti). Hold for 5 breaths, then switch legs.
Phase 3 - Seated Grounding and Backbends (5 Minutes)
Goal: Reopen the front body, strengthen the posterior chain, and stretch tight groins and hip flexors close to the mat.
Bridge Pose (Setu Bandhasana): 2.5 Minutes (2 Sets of 5 Breaths): Lower down onto your back with your knees bent and feet flat on the floor, hip-width apart. Press firmly into your feet to lift your hips into Bridge Pose, interlacing your fingers underneath your back. Hold for 5 deep breaths, lower down slowly, rest for two breath cycles, and repeat for a second set (or slide a block under your sacrum for a supported restorative alternative).
Bound Angle Pose (Baddha Konasana): 2.5 Minutes (8-10 Deep Breaths): Roll up to a seated position. Bring the soles of your feet together, letting your knees drop open to the sides. Sit tall on a block or blanket, hold your feet or ankles, and breathe deeply into your inner thighs and lower back.
Phase 4 - Restorative Integration (2 Minutes)
Goal: Allow the cardiovascular system to settle, integrate the physical benefits of the practice, and reset the nervous system.
Corpse Pose (Savasana): 2 Minutes (Full Stillness): Extend your legs long on the mat, letting your feet flop open naturally to the sides. Rest your arms alongside your torso with palms facing upward. Close your eyes, release all conscious breath control, and surrender completely to stillness..
PRACTICE INTEGRATION
Building a Sustainable Daily Practice
A yoga journey is not about perfecting complex shapes overnight, it is about carving out dedicated time to reconnect with your body, cultivate functional mobility, and bring calm to a busy mind. By focusing on these ten essential postures, you have built a strong, anatomically sound foundation that directly counters the physical stresses of modern desk life.
Remember that progress in yoga is measured by consistency, awareness, and breath quality rather than how far you can bend. Listen to your body, lean into prop modifications whenever needed, and embrace small, incremental adjustments over time.
Use these baseline poses as a stepping stone into guided studio classes, your practice is uniquely yours. Step onto your mat with patience, stay rooted in your breath, and enjoy the transformative journey ahead.
Explore our complete curriculum, review upcoming 200 Hour Yoga Teacher Training In Rishikesh, batch dates or speak directly with our admissions team to plan your arrival in Rishikesh.
How often should a beginner practice yoga each week?
For noticeable improvements in mobility, strength, and stress reduction, aim for 3 to 4 sessions per week. Even 15 to 20 minutes of consistent, focused movement is significantly more beneficial than a single longer class once a week. Consistency helps your nervous system adapt to new movement patterns and keeps joint stiffness at bay.
Do I need to be flexible to start practicing yoga?
Not at all. Saying you are too stiff to do yoga is like saying you are too dirty to take a bath. Flexibility is the result of practice, not a prerequisite. Yoga poses are designed to meet your body exactly where it is today. Using smart modifications and props allows tight muscles to lengthen safely without strain.
What essential equipment or props should I buy first?
You only need a few basic tools to build a versatile home setup - A sticky yoga mat to provide traction and cushioning for your joints, two high-density foam blocks will bring the floor closer to your hands in standing poses and supports your body in restorative shapes and a 6-foot or 8-foot cotton yoga strap to help bridge reach gaps during hamstring stretches without rounding your back.
What is the difference between practicing at home vs in a shala or studio setting?
Home practice offers maximum flexibility, zero commute time, and a pressure-free environment where you can move entirely at your own pace. A shala or studio setting provides live teacher guidance, direct tactile alignment corrections, and the focused energy of a shared group space. Combining both using home sessions for daily consistency and studio classes for feedback is often the ideal approach.
Can these 10 poses help relieve lower back pain from sitting at a desk?
Yes. Modern desk work compresses the spine, tightens hip flexors, and weakens posterior muscles like the glutes and hamstrings. Postures in this blueprint-such as Cat-Cow, Downward Dog, Bridge Pose, and Child's Pose-specifically decompress the lumbar spine, activate weak glutes, and restore natural pelvic alignment. Always listen to your body and back off if you feel sharp pain.
Born and raised in Rishikesh, Shivam Chauhan holds a B.A. in Psychology and an M.A. in Yoga from Uttarakhand Sanskrit University, with over 8 years of teaching experience. He specializes in traditional Hatha, Ashtanga, and Iyengar-inspired practices, focusing on precise alignment, balance, and functional strength for students worldwide.